Should you attempt shingling a roof on your own?
The importance of reliable and leak-free roof is obvious to everyone. This is not only the matter of staying comfortable and warm inside your house, but also being sure that you’re safe and protected there. That’s why proper maintenance is a key factor of prolonging the life of your roof, as its replacement or a large-scale repair is that kind of a serious money investment you don’t want to commit to more often than you can. So, when you notice the slightest damage on your roof or if you can clearly see that it’s covered in mold, algae or that a couple of shingles are damaged, you need to fix those problems as soon as possible. And, in order to notice those issues, you need to carry out regular roof cleanings and inspections or hire a roof specialist to do that for you. As they say, it’s better to pay less not to pay more.
But unfortunately, roofs get damaged and worn out overtime. They’re always exposed to different weather conditions and factors. Those phenomena deteriorate the state of shingles gradually or even instantly. Sometimes your roof may be ruined by a hurricane or just by a severe storm in no time. And aside from that, the roof is constantly subject either to direct sunlight, or precipitation, or strong winds, or everything at once, it slowly gets damaged while covering the rest of your house. So, no matter how hard you try, you’ll have to think about reroofing the house at some point of your life, especially if you’ve been living in an older house. Hiring roofing contractors is quite natural thing to do in that case, as they’ll be able to help you choose the best kind of roofing material to suit your location and budget limits. They will bring their own equipment as well. With their professional assistance, you’ll end up with a brand new roof sooner than you would expect.
Obviously, you won’t go too far without hiring contractors if you need to install a roof on a new home or an outbuilding that is only being built, as in this case setting up a sturdy the roof base comes way before laying the sheeting and attaching the shingles. And if you decide to hire a team of experienced roofing contractors in your local area, you may search for them HireRush.com. But what if you just want to reroof the house due to the fact that the old roofing is too old to cope with its functions? Can you do that on your own? I think you may totally undertake this task. You should only ask yourself a couple of questions and successfully pass one single test. 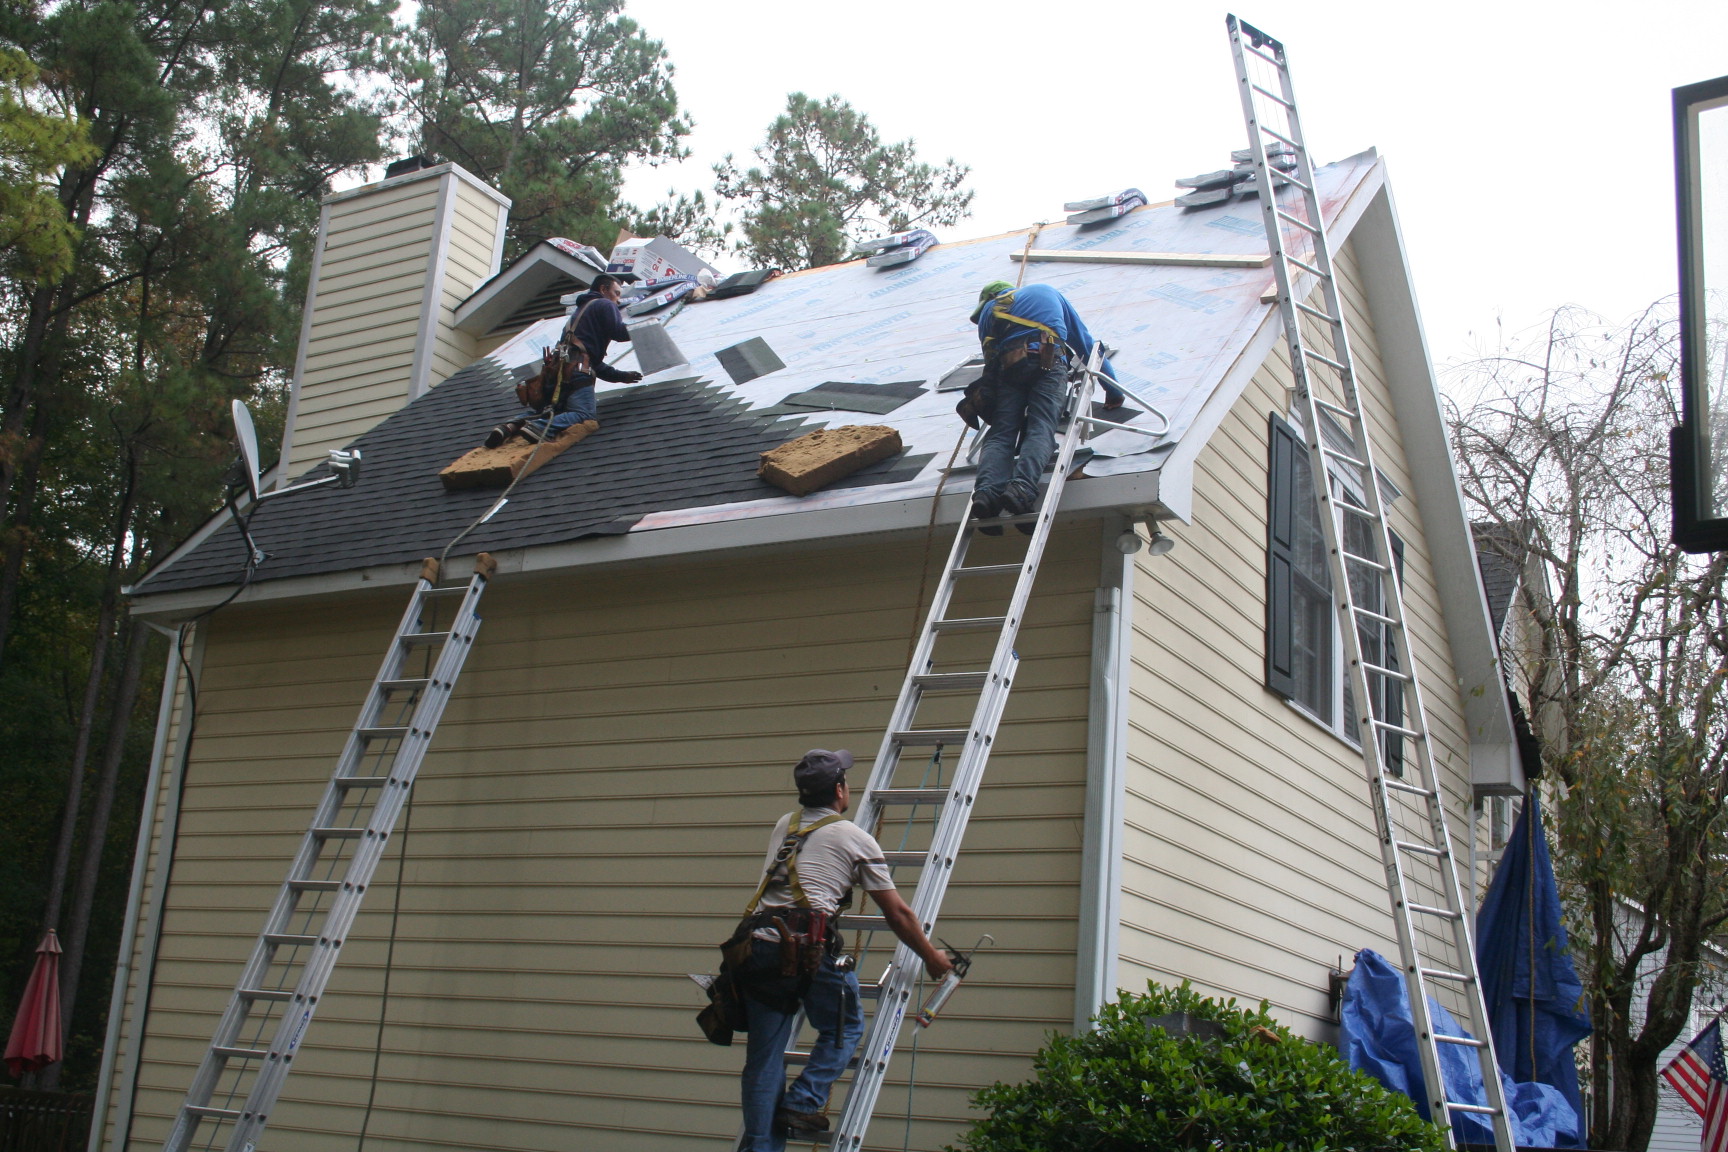
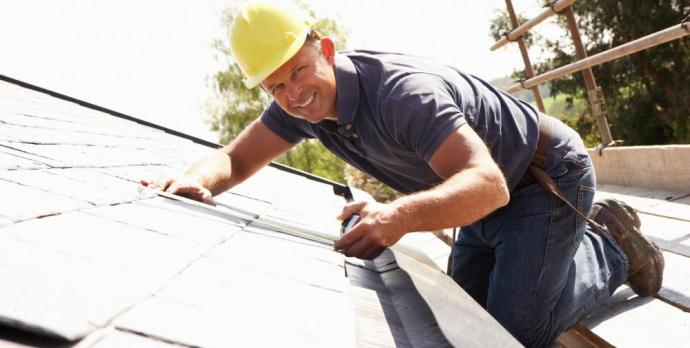
Hire a roofing contractor
Are you good at simple handyman’s jobs like nailing something onto the wall? Are you able to cope with monotonous and labor-intensive work? If your honest answers to those questions are both ‘yes’, then you should grab a tall ladder and go outside. Lean it onto the house wall and climb on its top. If you feel comfortable staying here for a couple of minutes, if you don’t freak out and if your only wish is not to come down as soon as possible, then you may totally attempt reroofing your house all by yourself. The only thing is that you need to find out how to roof the house properly first. And I’m here to help you out with that, as we’re about to learn how to lay shingles and prepare the roof for them.
Steps to shingle a roof
Step 1. DIY roofing tools and materials
This DIY roofing project doesn’t require too many tools or materials. Obviously, you have to make sure that you buy enough roof shingles, nails and staples, so that you don’t have to take a shop run break in the middle of installing the shingles to purchase more of them. When choosing the color of asphalt shingles, opt for the one that is several tones darker than your house siding.
You’ll also need to buy the self-stick waterproof underlayment and felt paper to create the sheeting. Check your current flashing, including vent and valley ones, and metal drip edges to see if you can reuse them or if you need to buy the new ones. Don’t forget about the caulk gun, utility knife and hook blades.
You’ll need to perform quite a lot of nailing. That’s why it’s better to purchase or rent the roofing nailing gun with air hose and compressor for it. A stapler, a pry bar and a garden fork will come in handy as well. A roof harness, a helmet and a roofing ladder (or roof jacks on rafters) are the safety must haves you can’t start roofing without.
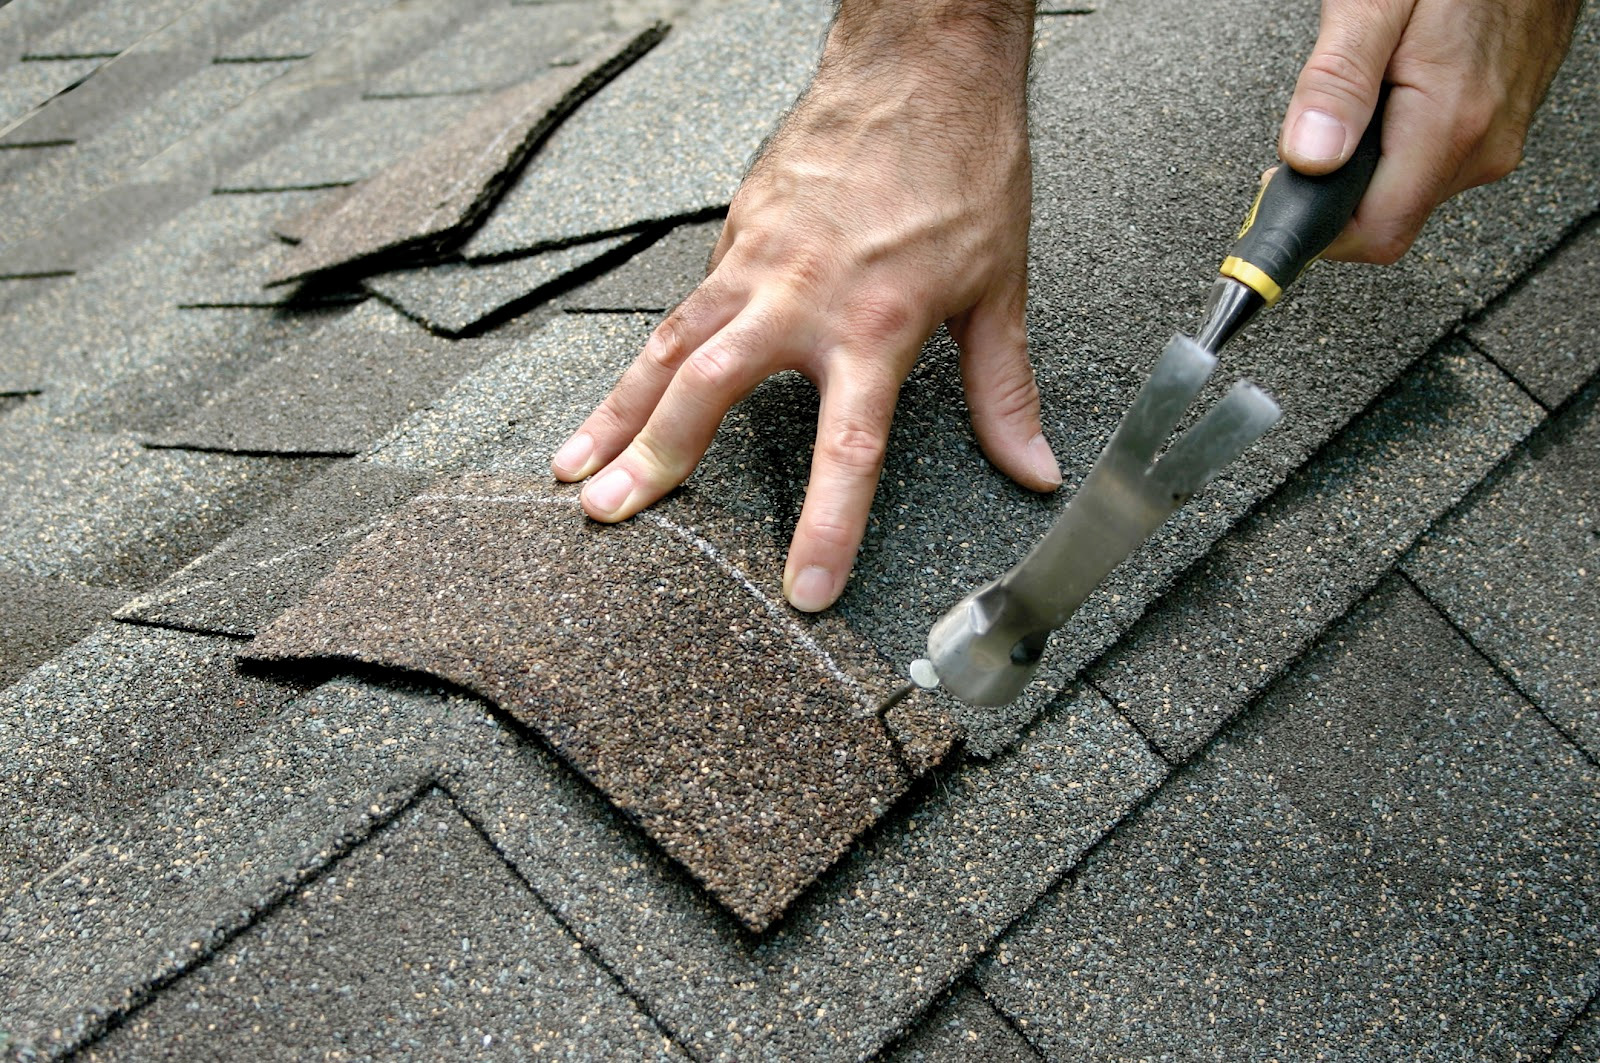
Step 2. How to tear off the old roofing
Take all the safety steps (secure the safety harness, install the roofing ladder or nail down the jacks, put on the shoes with soft rubber soles) first. You’ll have to climb on the very top of the roof and start removing the shingles form there. Try not to damage the wooden base of the roof while doing that. Find a garden fork or a special tool, designed to strip down the shingles (a shovel) and start removing the first cap shingles. Work your way down the roof. Be careful near the vents and valleys. You may have to tear off the last shingles near the roof’s edges by hand.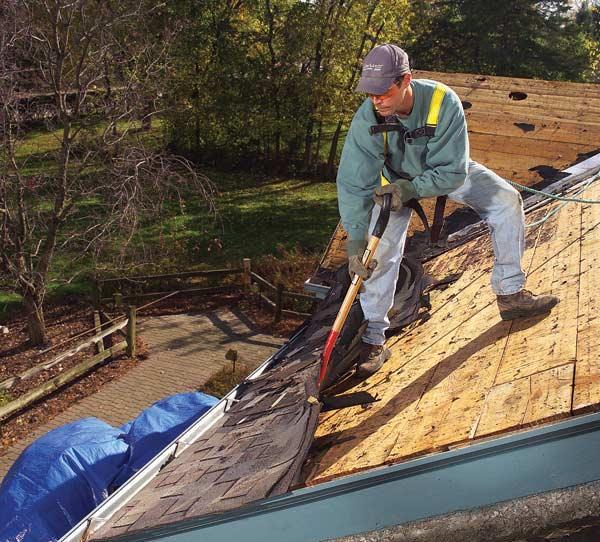
When all shingles are gone, use the pry bar to detach the flashing from the roof on its valleys and near the vent. Bring down those metal pieces as well. See if you’ll be able to use them while installing a new roofing.
Clean the roof in the end of the process and make sure that it’s protected during the night. Step 3. Roll on the underlayment
It will be great if you manage to attach the felt to the roof, as well as ice and water barrier to its bottom that same day. The latter one is self-adhesive, so you’ll just have to roll it out and stick to the roof, making sure that there’re no air bumps. Some people roll it directly onto the wood base, but some roofing contractors prefer placing it on the layer of the felt paper, installed in advance. Anyway, this step shouldn’t be too difficult, as underlayment is self-adhesive.
But you’ll have to work with a stapler to cover the rest of the roof with the protective felt material. Secure each short section of it with 12 staples at the center of the sheet. Don’t forget to overlap each previous row of felt (or ice and water underlayment) by 2-4 inches. Drape the felt over the peak when you reach the roof’s top.
If you’re running out of time and it’s getting dark outside, just cover the parts you didn’t manage to protect with felt, using the ordinary plastic cloth.
Step 3. Ensure extra protection to the valleys
Professional roofing contractors recommend covering the valleys with a layer of the same waterproof self-stick underlayment you’ve used at the roof’s edges. For that matter, cut a strip of underlayment according to the valley’s length, peel off all the plastic that covers its adhesive side. Ask your friend for some help. One person should hold one end of underlayment with its sticky side up. Lay it onto the valley and push the underlayment into its crease first. Straighten the rest of underlayment and make sure that there’re no air bumps.
Step 4. How to install shingles
Attach the drip edge to the ends of the roof first. Then, you may start nailing down the first row of shingles. Place them just ½ inch over the drip edge. The adhesive strip should face up at this point, so that the next row of shingles sticks to it.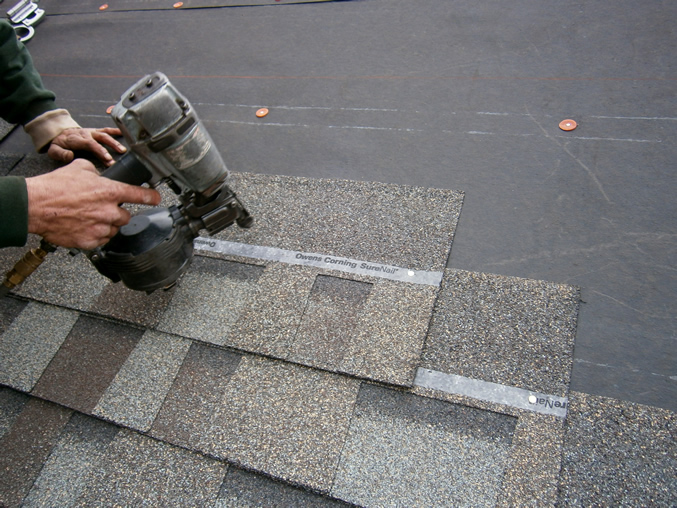
Continue laying the shingles, attaching them to the roof with 4 or 5 nails. Don’t forget about overlapping and keeping the rows of shingles as straight as possible. You need to place the each next row of shingles at the same distance from its previous one. A pry bar of according width may be your guide.
Step 5 (ish). Working near the problem areas
Be extremely careful while working around the metal flashing and vents. Make sure to install the shingles above the dormer flashing, but over the step one. Cut out a piece of self-adhesive underlayment to lay it around the vent before installing the shingles near it. Place the metal vent flashing on top of the shingles and attach it to the roof with the help of roofing gun.
 When both sides of roof are covered with shingles, go back to the roof’s top to cover the ridge with cap shingles.
Shingling a roof is not too difficult, as you just have to nail each shingle to the roof. However, it is the most time-consuming and tiring part of the project.
Step 6. Final touches
Sweep the roof to get rid of all debris and access pieces of roofing materials you’ve left there during the shingling process. When that’s done, grab your caulk gun and seal the nails on the vent flashing, as well as the gap between the vent pipe and flashing. Treat the valleys’ step flashing the same and you’re finished.
From now on your task is to ensure the brand-new roofing you’ve just installed a proper cleaning and maintenance routine.
Learn more about roof cleaning and maintenance