Fall is the best time to take care of your sprinkler system. Read this article and get to know how to prepare it to low temperatures properly.
As winter is coming soon, you should think of adjusting your irrigation to cold weather. It may seem too early, but if you don’t want to miss the opportunity, it’s better to start taking measures right now.
Why you need to winterize the sprinkle system at all? It appears to be a common problem for many homeowners to provide a proper maintenance for it.
The main cause of probable sprinkle damaging is water that stays in pipes. It can harm the material (no matter plastic or metal) and lead to the system break down.
There are some ways to prevent unreasonable spending protecting your irrigation system. They also vary depending on a region where you live.
But here we talked about 3 main methods to get the sprinkler ready for the frost. They are rather easy to complete even for unprepared person.
The project requires basic knowledge and tools any of you most probably has. Using our instructions you can do the winterization yourself.
Our tips provide you with the ability to save money for the job this fall. Moreover, you’ll also be insured against repair fees the next spring.
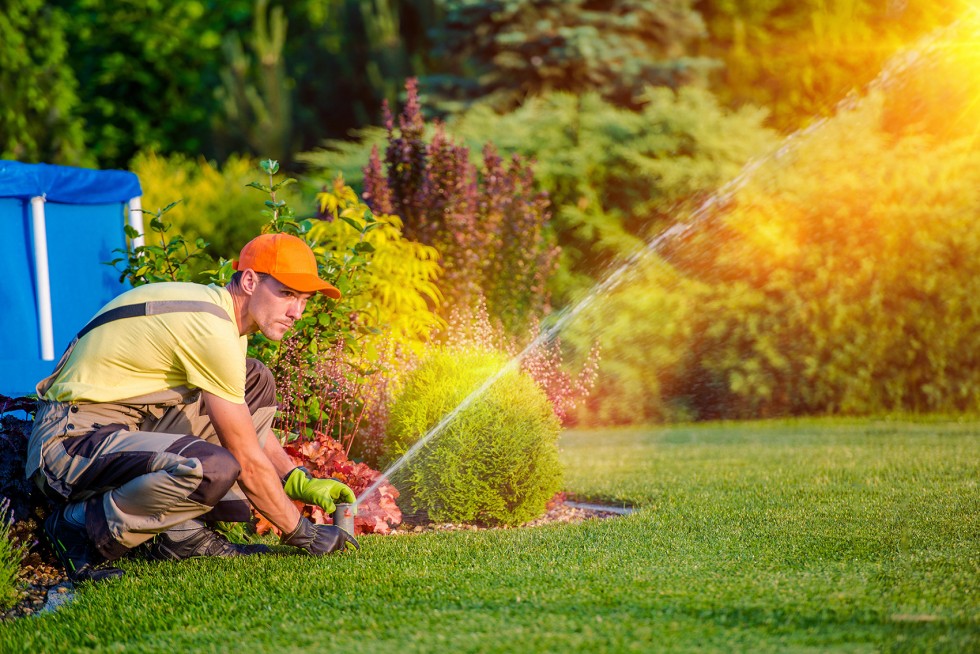
The main tusk is just to remove water left in the pipes in order to prevent freezing.
It looks quite simple, yet there may be some problems. You must be aware of the type of the irrigation system you use, the weather conditions and how deep under ground the pipes locate.
If you aren’t sure you can do everything in the right manner and get confused about all this stuff, rely on the specialist. You can leave your request and find a suitable pro here.Leave your request here
For the instructions look over the tips below. Our guide will show you how to winterize the sprinkler system, if you want to do it yourself.
3 methods to winterize sprinkler system
-
Manual drain valve
To use this method you must ensure first that your irrigation system has manual drain valves. So follow this tip only if it was designed in such manner.
To find the valve, look at the lower part of the main line. There are different kinds of valves, but it doesn’t actually matter for you and won’t hamper to get the job done.
In some case there are not only one valve but also some additional ones. It’s important to find them all and make sure they are empty as well.
Before getting started, take care the water doesn’t deluge your house. This is especially the issue when drain valves are located indoors.
For the outdoor drain valves, don’t forget to check the necessary gravel layer, over which the pipe is buried in the ground. It also will contribute to removing water.
To drain the water your just need to do several steps. Manual drain valves were in fact designed to make the process easy and available for the person.
Begin with shutting the water supply off. For this purpose, find a valve box at around five feet under the ground.
This is a necessary step. But take into consideration that there is no need to apply too much force to the valve. Just slightly turn it into off position.
Then find all those valves we mentioned above. They are set on the pipe’s ends and lowest points.
Open the valves. Let the water pour out of the whole system. Make sure you emptied all of it.
Sometimes you need to lift the head of the sprinkler a bit in order to direct the water stream. That’s because some of irrigation systems are equipped in such way that the water could de drained in one direction only.
As far as you finished, close the valves. Besides, note that you may also have to check your system for backflow device.
Always follow manufacturer’s instructions, when find it difficult to understand the proper maintenance for your particular system. Alternatively, get some help from sprinkler repair specialists.
Finally, have all the caps opened during the winter.
-
Automatic drain valve
Automatic drain valves are the devices that drain the water automatically, when the irrigation system is shut off. As you turn it on, the drains let the water move freely and reach the sprinkles.
But you don’t need to know all these internal building and organization details. The system as you see, successfully does all the job for you.
So you don’t have to drain the water yourself to provide a decent sprinkler system winterization. But you do have to check for any water on the ground.
If you noticed it, that may show you that the valve drain wasn’t closed during the system operation.
One more useful tip from HireRush.com for you is to check the control valves. You should disassemble them to ensure the complete draining (the same works well also with manual valves).
At last, remember that you mustn’t use automatic drain method to the mainline.
-
Air blow-up
This method of draining your sprinkler system is about circulating the air over the pipe. The high air pressure will ensure the water get out of it entirely.
This way is probably the most efficient one. At the same time, working with air compressor is dangerous enough for the people with no skills and experience.
In addition to it , it’s not easy to choose the right volume of the compressor. Under such circumstances, consulting the manufacturer’s manual seems to be inevitable.
Even though, be double cautious when working in order to prevent injuries. Otherwise, consider getting an expert’s help.
You can rent or buy an air compressor for this job. But try to get a right one, providing from 10 to 25 CFM air volume.
Start from connecting the couples to the irrigation system. Remember to close a back flow valve.
Use your compressor at fifty or eighty psi (depends on the type of piping). But don’t start flowing until one of the sprinkler heads is open.
Make sure you hooked up the equipment correctly. Then set on the timer. Be cautious! Wear the eye glasses and get back of the valves and pope during compressor operation.
At first, blow out the line with a small pressure. Increase it gradually. The water should get out of the heads.
Proceed from one zone to another. But don’t overdo. You know that the hot air can easily make the plastic melt.
That’s why, let the system cool. Then, run the compressor one more additional time, activating each of sprinkler’s head in turn.
Disconnect the tool and leave the heads open to remove excess air.