If your house was built quite a long time ago, say fifteen or twenty years in the past, it’s likely to have many cracks and holes all around it now. Those let the moist, cold, or hot air from the outside indoors and the conditioned air from the inside outdoors. That increases your household expenses and causes the structure of the building and the interior to deteriorate faster. What can you do to prevent it from happening? The answer is caulk. In this post, we are going to talk about the places in your house where you should caulk, required tools and materials, and the essential steps in the caulking process.
1. What is caulk?
Caulk is a rubbery sealant that serves as a barrier to water and moisture. It is most often used to fill the cracks and holes that form between various building materials. Modern caulks are of different tones and can be painted over. By blocking water, caulk prevents wood from rotting, and keeps mildew and mold at bay. Thus, you reduce your bills and make your home environment healthier.
2. Places
As the main function of caulk is to stop the water from getting into the interior of your home and its elements, the main places for caulking are these:
Attic
Having the attic securely protected from the loss of warm air during the cold season is very important. You can achieve that by using high-quality insulation. However, to eliminate any gaps in the insulating material, you can additionally seal them. Apart from keeping your house warm, and thus reducing your expenses, caulk also prevents ants, bees, and other insects from getting indoors, and stops rain water.
Windows
Even with new, modern windows, caulking may be necessary so that no rain water and hot or cold air could get inside. It’s even more beneficial to fill the gaps in old wooden windows to prevent wood from rotting.
Walls
Brick and cement walls may have tiny crevices or even large cracks that can be filled with caulk.
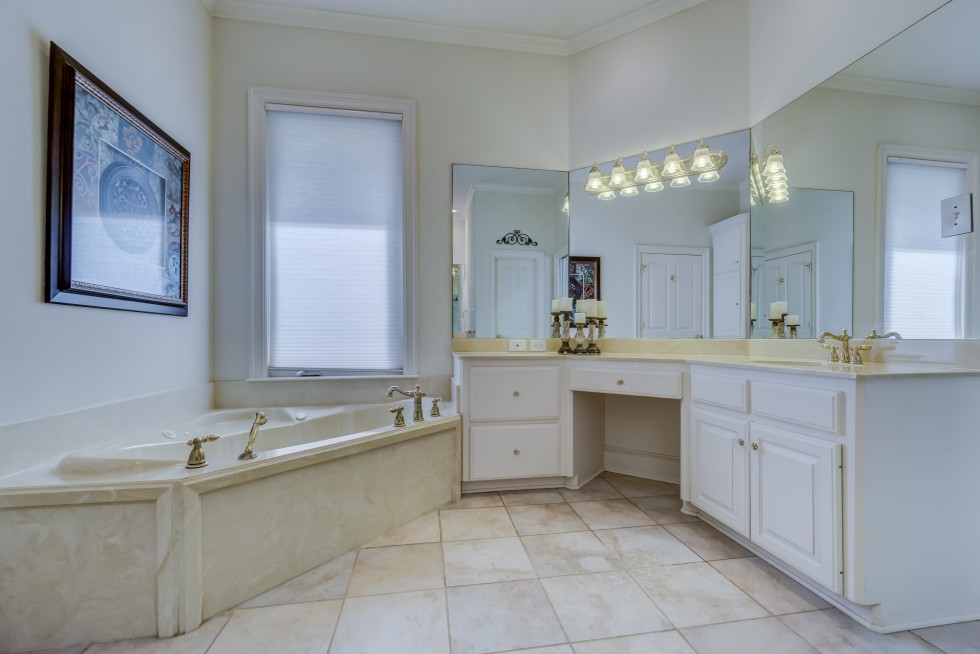
Kitchen and bathroom
These are the rooms where water reigns. Normally the sealant is used in the following spots:
- The joint between the kitchen sink and the countertop.
- The area where the shower or bathtub meets the floor surface.
- The areas where hot and cold water pipes come through the walls or the floor.

3. Tools and materials
One benefit of caulking is the good value/money correlation as caulk is quite cheap (from $2 to $6 for a tube). This is what you will need to effectively seal different places in your home:
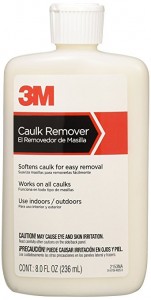
- Caulk remover. It softens old sealant, helping you remove it easier.
- Utility knife and scraper.
- Painter’s tape to achieve proper finish on the job.
- Caulking gun. This may not be necessary if you buy a tube of caulk you can squeeze with your hand. However, we recommend using a caulking gun for greater accuracy and convenience.
- A sponge or rag. Make sure it’s wet. That’s because caulk is an extremely sticky substance and moisture will prevent it from remaining on your hands.
- Vacuum cleaner. You will need one to thoroughly clean the place before caulking.
Source: https://www.amazon.com
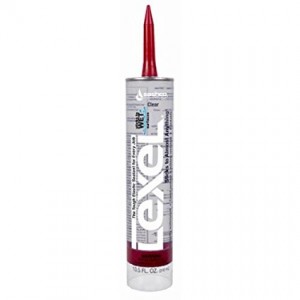
Finally, you need to purchase caulk itself. Several types are available on the market. They differ in certain characteristics and are used for particular places in your home. Here is a quick rundown.
- Siliconized latex caulk:
- Good adhesive properties.
- Water resistant.
- You can paint over it.
- Typically used in bathrooms.
- Acrylic latex caulk:
- Good for places with frequent temperature fluctuations as it doesn’t change its properties.
- Can’t last long in damp environments.
- You can paint over it.
- Polyurethane caulk:
- Expensive and high-quality. Good for filling the gaps between different kinds of materials such as wood and metal.
- Susceptible to sun rays and can break when used outdoors.
- Silicone caulk:
- Has excellent water resistant characteristics
- Hard to be painted over.
- Can’t stick to wood.
- Hard to remove.
Which type you choose, depends on the place you are going to seal.
Source: https://www.amazon.com
4. Steps
The caulking process in essence looks almost identical regardless of the place and includes preparation, caulking proper, tooling (smoothing over the caulk), and cleaning. Let us go over the steps of caulking a window as an example. Read this article to learn how to caulk the bathroom and toilet.
Preparation
- Read the weather forecast. Caulking requires low humidity and comparatively high temperature (minimum 45°F). You will also have to wait for 24 hours before exposing the sealed place to moisture. Therefore, ensure that it won’t rain for a day after you finish the job.
- Take a good look at the window you want to caulk. Make sure it is clean and the window casing is in good condition and dry.
- Get rid of the old caulk. If the window has been caulked before, you need to remove every trace of the old material: no foreign objects should get into the new caulk. To do that:
- Pour some remover along the old sealant to make it softer.
- Take a utility knife and cut large pieces of the old material.
- Use a scraper to remove the remaining bits and pieces.
- Wash the joint with a damp sponge and let it dry before proceeding.
- Put a tube of caulk into the caulking gun.
- Cut the nozzle of the tube at the angle of 45 degrees slightly more than half a centimeter from the tip.
- Stick an iron nail into the tip until you feel you’ve broken the seal inside.

Source: https://www.amazon.com
Caulking proper
- Place the tip of the tube on one of the window corners and press the gun handle to apply the first sealant.
- Move the tip in the direction of the opposite corner applying enough caulk to fill the gap. Alternate pressing the handle and releasing it until you come to the end.
Tooling
Take a damp sponge and use your bare finger, popsicle stick, or the back of a spoon to smooth over the sealant. Clean your finger (or the object) with a sponge from time to time to remove caulk from it.
Cleaning
- Remove any excess of the sealant with the sponge as dried caulk is very stubborn and hard to remove.
- Let the fresh caulk dry for about a day.

Keeping your house in order doesn’t only suggest cleaning it regularly and organizing your things in the most efficient way. You should also prevent the ruinous forces of nature from damaging the exterior and interior of your home. Caulking will help you with that.