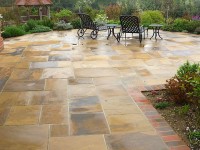
A retaining wall is a smart landscaping solution to a sloppy backyard. Such a practical element is mainly aimed at holding back the earth from falling in your backyard and your home if it’s built on a hill, as well as rearranging a yard with a slope making it more functional and spacious. But, apart from being a protection structure designed to avoid flooding, land slipping and erosion, a retaining wall is also an eye-catching part of any outdoor space.
The most common materials used for the retaining wall construction are brick, stone (natural or manufactured), concrete and wood. Residential landscaping contractors base their material choice on the primary purpose the certain retaining wall has to serve, the style of the property and the owner’s budget. No matter what it’s built of, a retaining wall gives a backyard some beauty and definition, provides for a multi-level landscape with the terrace potential and enables creating intimate backyard relaxation zones and playground areas.
Depending on the kind of the retaining wall you want to build, its required height and length, the peculiarities of the problem slope it has to hold back and the overall difficulty of the construction, you may totally consider building a retaining wall in your backyard on your own. If the wall you plan to build is less than 4 feet tall and less than 12 feet long, you may easily call its construction a weekend-worth DIY project.
However, it has to be taller than that and its construction is complicated by the awkward slope that’s difficult to handle, you’ll have to turn to the qualified masonry contractors. As when the retaining wall is built poorly, when it is standing on an uneven base and when it’s not strong enough to withstand the weight of the land it has to hold back, it will eventually fall down. Any damage caused by a poorly built retaining wall in most cases results in damage that far exceeds worth repairing. Most homeowners that have too many repairs caused by a hillside collapsing on the home or causing a mudslide typically opt to sell their house fast to cash investor such as Sell Quick California.
These tips will help you build a strong, long-lasting retaining wall that fits your landscape perfectly. And, masonry and landscaping contractors from HireRush.com will be more than glad to create it for you if you recognize the need for professional assistance and leave a request on the website.
Building a retaining wall: steps to follow for a stunning backyard makeover
Step 1: Planning the designing and the layout
The first thing you need to do after deciding on the design of the future retaining wall and the kind of material it’s going to be built of, is to make sure that the local codes allow building such structures. If they do, check the maximum height of the wall you can build as well.
Step 2: Precautions
Before you start digging the base for your retaining wall, don’t forget to call 811 to ask the workers to mark the utility lines buried on your lot. This will prevent you from causing accidental disruption, which might be not only quite costly to fix, but also really dangerous for you and your neighborhood.
Step 3: Tools and materials
Now, you can go shopping for the materials. This guide is applicable to building stone, block or brick retaining walls. Thus, we’ll discuss the tools and materials required for their construction. So, apart from purchasing retaining wall blocks, you’ll have to get:
- landscape fabric
- gravel for drainage
- drainage pipe
- construction adhesive suitable for the blocks of your choice
- paver base
- landscape stakes
- mason line (long rope)
- marking paint
Note: purchase 10% more blocks or stones that estimated to have backup blocks for future maintenance repairs or to replace the ones that might break during the construction.
Regarding the tools you’ll need for this project, those include:
- shovel
- circular saw to cut the blocks if necessary
- hammer
- rubber mallet
- long level
- speed square
- chisel
- tape measure
- hand or electric tamper
- garden rake
- work gloves
- dust mask
- safety glasses
Step 4: Marking and excavating the trench for the retaining wall
Mark the layout according to your plan to start digging. Use landscape stakes and mason line for that matter. Marking paint will help as well. Make sure that the stakes level up to build a perfectly straight retaining wall. If you don’t mind the extra work and precision, you may add curves and other design elements to your retaining wall to make it look more beautiful and extravagant. Consider adding steps as well.
Take your shovel and start digging. You might have to hire landscapers to excavate the trench to avoid that part of manual labor. The width of the trench will depend on the width of the blocks you chose and the number of base rows you planned to include. But, the depth of the trench should correspond with the height of the future wall.
For instance, if you’re building a retaining wall that’s 3 feet tall, you should provide from 4 to 6 inches of compacted base material. So, dig the trench that would fit that layer, as well as at least a half of the first row blocks’ height.
Most likely, the trench will slope along with the hill. Then, you’ll have to step up and down when digging the trench. But, the retaining wall still has to remain level. Therefore, make sure to use a torpedo level when creating trench space so that the wall stays the same height and leveled despite the hill.
Step 5: Making the base
Use a hand tamper to compact the soil at the bottom of the trench. Next, fill the trench with the paver base (a 3-inch layer will be just fine), spread it evenly all over the trench with the help of a garden rake and tamp it down till well-compact. That’s how you’ll provide a decent foundation for a strong retaining wall.forget to check if the base is level. In order to do that, drive two steaks into the base so that the stick-out parts are of the same length. Next, lay a long 2×4 plank on top of them and rest your level on the plank to see if your retaining wall foundation is good to go.
Step 6: Building the retaining wall
Start laying the first row of blocks of your retaining wall. It’s recommended to begin from the end point of the lowest part of your retaining wall and go uphill. Set the first row of blocks and check if they’re even back-to-back and side-to-side using a torpedo level. The first row is the most difficult and the most crucial one, so pay due attention to its leveling and installation. Setting up the first row of blocks appears to be a bit tricky, try to add a bit of the base material around/under them and tap the blocks down using a rubber mallet. This will help you keep the things leveled.
Start the next row with half block and install another few rows of retaining wall blocks on top of the first one. Opt for stagger joints for better structural integrity and stability. Remember to periodically check if the blocks are set up at the same level. If the blocks you use for your retaining wall don’t feature a locking mechanism, apply construction adhesive between the rows of blocks.
Step 7: Creating drainage
Substantial drainage is vital for a long-lasting and well-functioning retaining wall. Therefore, once the first few rows of the retaining wall are in, you’ll have to create proper drainage behind it. For that matter, compact the soil behind the future wall, spread the landscaping fabric over (don’t forget to leave the access to the top blocks) and fill the space right behind the wall with gravel. You may install a drainage pipe to channel the accumulating water out from the wall and prevent any water damage. In case if you don’t have landscaping fabric, you may opt for a thick layer or gravel (8-12 inches) if the slope allows and a drainpipe.
Step 8: The last rows of blocks
After finishing the drainage, install the last rows of retaining wall blocks. Add capstones if you wish. Those aren’t essential at all, but they just make retaining walls look more neat and complete. It’s a nice touch to finish the wall with.
Note that even if you use blocks with the locking mechanism, the last two rows have to be installed with the adhesive. Capstones have to be attached to the retaining wall with the proper adhesive as well.8: Finishing touches
Once the wall is practically installed, you’ll need to clean up the site and organize the space behind the wall. You may spread the soil you’ve excavated when creating the base trench over there and seed the grass, construct a flower bed or even build a terrace with the second retaining wall. The designing part is completely up to you.