If you’ve always wanted to have a couple of hens to have fresh home-grown eggs on your table or if you want to have a safe place for a hen and her small chickens to run around and live in, you’ll have to think about building or purchasing a chicken coop. It’s basically an outdoor wooden living, ‘sleeping’ and nesting area for not too many chickens. It provides the place for your chickens to walk around, nibble on the grass and grains while enjoying the fresh air. And, it may have a roost and a nest (or a couple of them) to keep your chickens in during the nighttime and give them a place to lay eggs.
However, most of the chicken coop designs are quite difficult to recreate, especially if you’re not too keen on DIY projects or if you’re just not quite an experienced person in this sphere. Then, there’s an option of purchasing a chicken coop kit and just assembling it like a piece of the flat-pack furniture. But, those coops might be quite expensive. And, you might not be ready to spend so much money on just a couple of chickens. Also, you may invite a carpenter and ask him to build a chicken coop for you.
Such a specialist is really good at working with wood, so he’ll be able to recreate practically any chicken coop plan you may easily find online for free. Or, he may help you design a customized coop regarding your needs and the location of future chickens’ home. It’s a perfect option for those people, who’re willing to keep more than 5-7 chickens on a regular basis and want to give their birds nice and spacious permanent home. If that’s something you’re looking for, go to HireRush.com, look through the carpenters’ profiles and evaluate the costs. Then, you may post a chicken coop building task on our website and let the professionals contact you, discuss the project and proceed to its execution. Or, you may contact a couple of carpenters directly from the site and see if one of them is ready to take upon this kind of job.
But, if you need a small and portable home for a small number of hens and/or chickens, you may totally build it on your own. You just need to find a simple DIY plan on Countryliving.com, for instance, purchase some materials and collect a couple of tools. Then, you may follow the instructions below to make a coop for your chickens. Good luck!
10 steps to build a chicken coop
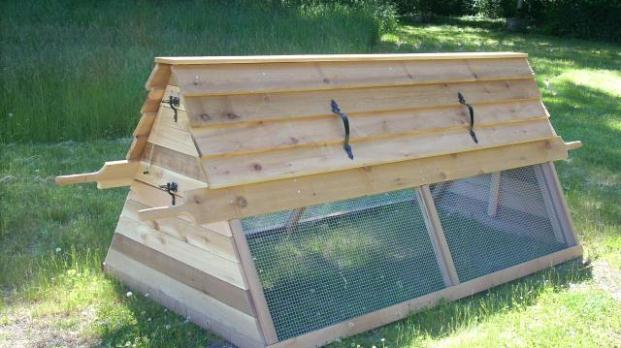
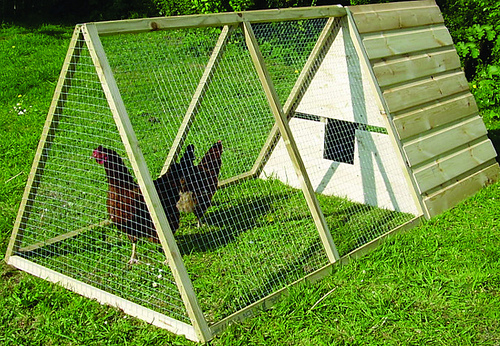 Step 1. An A-frame chicken coop is probably one of the easiest to build, as it’s basically a wooden pyramid or tent divided into two parts – the outdoor and indoor ones. Moreover, it is also the most convenient one for those people, who’d like to move the coop around the garden to give the chickens a new spot to peck the grass on.
Step 2. The size of this kind of coop may vary depending on how many chickens you’re planning to keep in it. Thus, the length of the base wooden bars may be chosen according to that fact too. It’s recommended that each chicken gets 4sq.ft. of space in a coop. I’ll give you a list of materials and tools required to build a basic chicken coop suitable for 12 chickens. Those include:
- 2 pieces of 2×4 lumber 120” long, 2 pieces – 117 3/4″ long – for braces
- 9 pieces of 2×4 lumber 60” long – cut at 60º at both ends – for rafters
- 2 pieces of 2×4 lumber 117 3/4” long – for top ridges
- 1 piece of 3/4″ plywood – 48 1/2″x56″ long, 1 piece – 28 3/4″x57 3/4″ long – for floor & back
- 2 pieces of 3/8” plywood 25×60 3/4”, 4 pieces of 1×3 25”, 4 pieces of 1×3 56 1/4” – for doors
- 40 ft of 30” wide chicken wire – for the wall protection
- 15 pieces of 2×2 lumber – for a ladder
- 6 pieces of 2×4 lumber 32 3/4” long – cut at 60º – for supports
- 1/2’’ and 1/4’’ screws (about 100 of each type)
- 2’’ nails
Step 3. Before building a coop, you should clear out the space you’re going to set it up on. And, it’s also necessary to find a sharp saw, a drill, a staple gun, a hammer, a speed square and a tape measure. Safety glasses will come in handy too.
Step 4. Then, you’ll have to cut the wooden bars to the necessary sizes. Build the base for the frames out of 2×4 lumber. Cut both sides of each frame base at 60 degrees. Then, get the top components of the frame and cut their bottom sides at 60 degrees, but the top sides – at 30 degrees. Assemble three frames using 1/2’’ screws. Drill pilot holes in the lumber before inserting the wood screws in order to prevent the lumber from splitting. When the frames are done, you’ll have to position them the way that the distance between the first and the second one is 54 3/4’’ and the distance between the second and the third one is 56 1/4’’. You may just make according marks on the 120’’ lumber pieces for braces.
Step 5. Cut the end panel from 3/4″ plywood. It should be a triangle with such sides: 56’’, 56’’, 48 1/2’’. If you want to have an easy access to the chicken running area, you may cut this piece in half and attach it to the frame with hinges to end up with an additional door. Then, you’ll be able to take out your birds easily without having to lift the entire coop.
Step 6. The next step of the project is connecting the A frames and the lateral braces. Don’t forget to fit the wire before doing that. Then, cut a couple of 2×4 lumber pieces at the right size and secure them into place. This will give your coop extra sturdiness and support. Afterwards, secure the wire to the wooden frame with 3/4” staples. Staple them every 2” wooden bars. Attach the plywood back. Make sure you align the braces properly.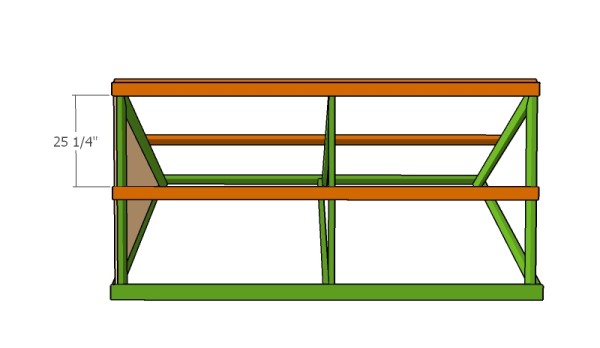
Step 7. If you want to be able to move the coop from one place to another, make the middle braces a little bit longer to have 12’’ handles on both sides of the coop. Thus, the length of the middle braces should be not 120’’, but 124’’.
Step 8. Afterwards, build the upstairs room supports from 2×4 lumber and secure them to the side braces of the chicken coop with screws. Cut the ends of the supports at 60º using a miter saw. Connect the components at both ends. To do that, drill pilot holes and insert the 2 1/2” screws from the outside. Measure the nesting area and cut a rectangle out of the plywood to make the floor. It should be 28 3/4’’ wide and 57 3/4’’ long. Secure it in place by driving the nails through the plywood right into the lumber supports.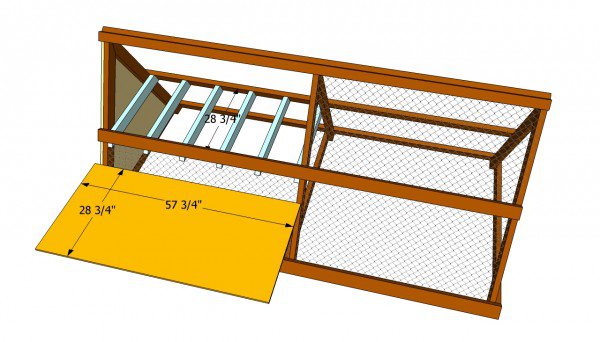
Step 9. Make a wall and a door for the nesting area. To do that, cut out two plywood rectangles. One of them should be 25’’ wide and 60 3/4’’ long and the second one should be 25’’ wide and 56 1/4’’ long. Attach the first one to the side of the nesting area with the help of nails. Then, get something like a handle and trims for the door. Attach them to the second plywood rectangle. Install it as the door for the nest area with the help of several hinges and a simple latch. If you want to be able to close the nest once the chicken get into it for the night, measure a small triangle (the front ‘wall’ of the nest the ladder will lead to) and cut out an according plywood shape. Attach it with the help of hinges and latch to make a mini door.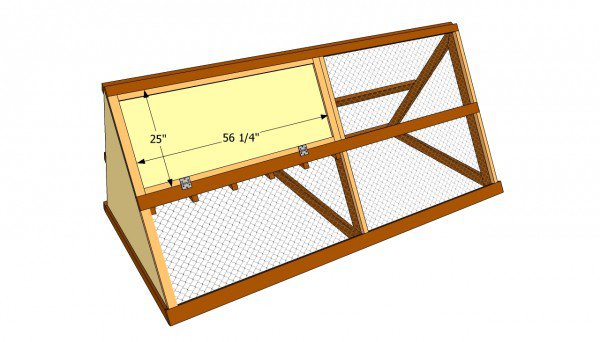
Step 10. Finish the chicken coop project by installing wire to the front end, as well as the 1×3 trims. Secure the latter ones into place with 2” nails. Treat the brand-new chicken coop by filling the holes with the wood putty and sanding the frames. In the end, build a 44 1/4’’ ladder out of 2×2 lumber and place it inside the walking part of the coop. Make sure that the distance between the steps remains 5’’. By the way, each step should be 11’’long and secured to the ladder’s braces with 2 1/2” wood screws.
(photo credit by https://www.strombergschickens.com/)
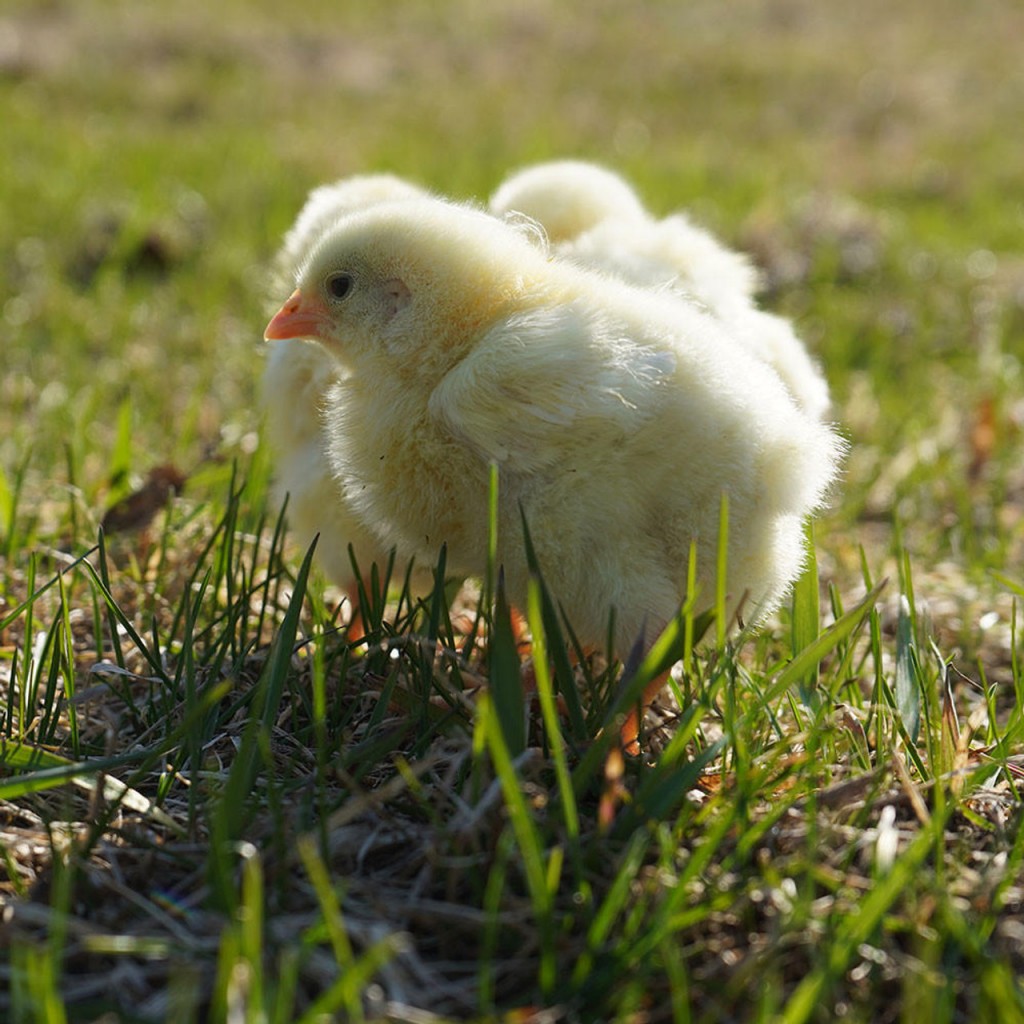
Constructing a chicken coop tailored for Cornish Cross chickens involves specific considerations to accommodate their unique needs. These fast-growing birds require ample space and sturdy shelter due to their size, necessitating a well-ventilated coop with robust flooring to support their weight. Integrating features like spacious roosting areas and easy access to food and water ensures the comfort and health of Cornish Cross chickens, fostering an environment conducive to their growth and well-being. Building a coop that prioritizes these factors facilitates optimal care and management of these popular meat birds within a structured and efficient space.