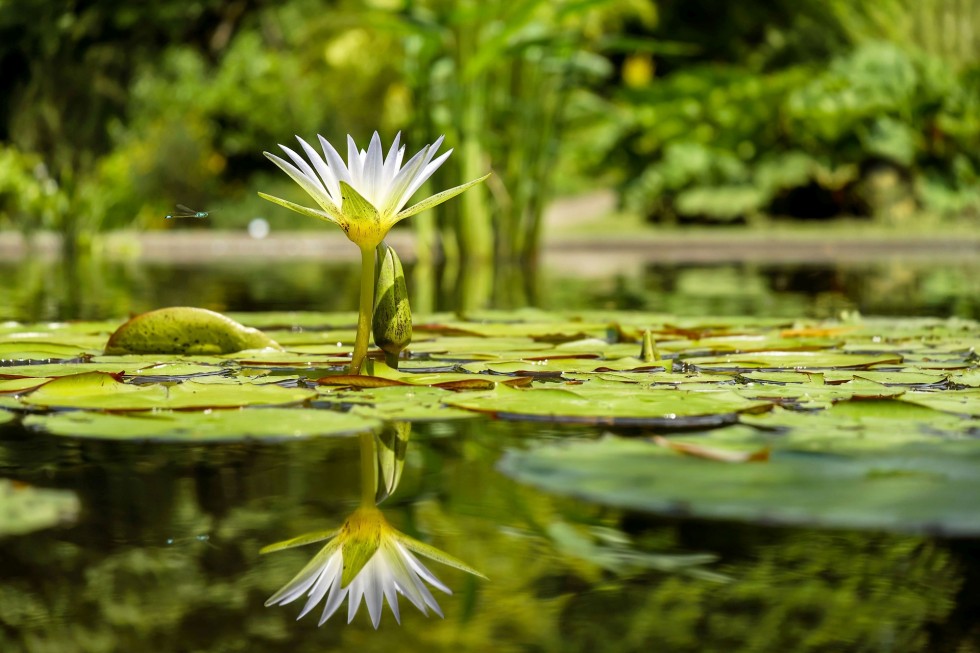
Garden’s water centerpiece
A natural looking water feature incorporated into your garden’s landscape will bring the touch of sparkling and joyful water to it. Garden pond will be the centerpiece of your backyard, something your eyes will always be drawn to.
And, if you decide to build it yourself, it will be an appealing garden improvement project you’ll be extremely proud of.
Building a garden water feature is a common practice for most of landscaping specialists.
Taking into consideration clients’ wishes and their view on the garden pond project, they come up with special designs, use various materials and reach versatile looks that fit existing garden landscapes and change them for better.
Those pros are able to add magnificent water effects like depth difference, fountains that resemble natural springs, waterfalls, etc.
They turn those human-build ponds into mini ecosystems by incorporating different water plants and populating these water basins with fish.
HireRush.com may offer you to leave a garden pond building request for landscaping pros in your local area or leave a message/call certain specialist of your choice directly from the website.
You’ll get reached out by landscapers ready to transform your garden by adding a gorgeous pond to it.
But, as usual, I won’t leave my inspired DIYers alone, as I’ve prepared quite clear and easy to follow instructions on how to build a garden pond of a small-medium size without no/minimum professional assistance.
Here you go!
Steps to build a garden pond
Preparation measures
- Choose the size, shape and location of your future water feature.
Opt for a curved shaped pond located on the well-observed spot of your backyard that’s not too low for all the precipitation to flow down to it and ruin your nice clear basin and the life of its living creatures/plants. - Make sure that the chosen spot is save to dig at. No facility lines should be under the area you reserve for the pond.
Go to Call811.com to find the number of your local call center and get those lines marked on your plot’s plan to avoid them while digging. - At least 6 hours of sunlight a day will make your pond thrive. So, make sure to find a shady, but also sunny spot for your natural water feature.
- Don’t forget that you’ll need to power your water pump, and, as most manufacturers require, it should be plugged in directly into the power socket. Usually, the use of extension cords is not recommended due to safety reasons.
So, check the length of the pumps’ cord, choose the longest one and locate your water feature closely enough to the nearest outdoor power socket. - Find appropriate tools. A nice flat shovel along with the spray paint/garden horse to outline the shape of your future pond, a leveling instrument and a long 2×4 wooden bar to ensure even edges is pretty much everything you’re going to need.
- Bear in mind that it will take you ages to dig a hole for a medium-large pond.
That’s why, even if you’re still determined to design and build it on your own, save your spine and hands and call professional contractors to get a good tractor to deal with the excavation part of the job. - Pond building supplies include: properly sized pond liner, sand, large, medium and small landscaping rocks, river rocks/crushed stone, a water pump with appropriate capacity and a plastic cover for it, electric line protective tubing to bury the pump’s cord and make it unnoticeable.
- Outline the pond’s shape and walk around the property to make sure you like it. Go inside your house to look out your windows and check the view.
Double check the location as well. If you’re completely confident about your choice, proceed to the actual pond building.
Pond building
- Start digging the hole according to the shape outlines.
Create higher and lower steps, flat shelves/platforms to imitate the natural depth differences. This will also make future pond designing much more interesting and elaborate. - Dig one-two deepest holes within your base one. One of them will be used as the pump spot. The lowest point should be about 35 inches deep.
- Use a wooden plank and leveling tool to make sure that the pond’s opposite edges remain on the same height. Fix the differences with shovel.
- However, the average pond depth should be determined with the wild life living conditions requirements taken into consideration.
What I’m trying to say is that different kinds of fish and water plants prefer different depths. So, you have to build a proper pond to have them in it. - Once the hole is done, its bottom is smoothed out, various poky roots and stones removed, it’s time to cover the hole with a layer of sand.
It will make the pond’s base surface even smoother. That is crucial for keeping the pond liner undamaged and preventing water leaks. - Sand base should do the job, but some landscaping pros use lining underlayment as well.
As they mention, it’s better to ensure a couple of levels of protection than struggle to find that one tiny liner hole that ruins the entire pond. - Cover the bed of the pond with thick good quality lining material. Don’t forget that the pond’s edges should be covered with it as well.
- Spread your liner around the pond as smoothly as possible. Use smooth rocks to lock it in place. Do the same on the outside, around the pond’s edges.
- Install special landscaping rocks that won’t puncture the lining material around the pond’s ‘walls’ (inside the hole).
Fill the gaps between them with river rocks.
Crushed stone is an option, but I’d prefer river rocks, as they won’t ruin the liner. - Use your imagination and inner landscaping talent to set the rocks around the pond on its edges.
Make sure that pond liner is unnoticeable. Again, fix blank spots with the help of smaller rocks and river stones. - Position your water pump in its protection. Set it and its cord with the help of rocks and stones. Run the cord through the stacked stones on the pond’s walls.
- Fill your basin with water. Don’t fill all the way up to the pond’s top. Leave 3-4 inches of wall rocks visible.
- Check the pump’s performance. If everything is all right, dig a small trench from the pond all the way to the outlet.
- Pull the pump’s cord through the protective tubing, place it into the trench and bury it under the soil.
- Adorn your pond with water plants (you may leave them in pots), populate it with its first inhabitants and relax by your brand new garden pond.
You’ve done a great professional landscaping designer worth job! You deserve it!


I recently built a pond in my garden and this article was incredibly helpful. The step-by-step guide is easy to follow, and the tips on choosing the right location and materials were spot on. The emphasis on planning and maintenance really made a difference in the success of my project. Thank you!
Hey very interesting blog!
Greate article. I’ m really impressed by it. And THANK YOU for recolling me about water pump.
You’ve performed a great job.