Unfortunately, nothing lasts forever. But you can considerably prolong the lifespan of many things. For instance, homeowners may keep their asphalt driveways in order for many years without the need to repair them. No matter how diligently they maintain their driveway, though, the moment comes when asphalt must be resealed or it will be gone for good. In this post, we’ll talk about the essential steps you need to take in order to repair your driveway asphalt and answer the most frequently asked questions related to the process.
What causes asphalt to get ruined?
The main cause of the driveway asphalt deterioration, according to professionals, is that the binding substance within it gradually dries out for a range of reasons:
- Wear and tear due to intensive use and age
- Water that accumulates on the asphalt and inefficient/missing drainage system
- Poor maintenance, bad or no sealing
- Freeze/thaw cycles in colder climates. As water thaws and freezes, cracks in asphalt grow wider.
Why is it so important to get rid of cracks and holes in my driveway asphalt?
If you don’t take timely measures to seal holes and cracks in asphalt, it may lead to the following problems:
- Water will get into the cracks and cause more damage, especially in states with freezing temperatures.
- Foreign substances will get into cracks, and eventually widen them, causing whole areas of asphalt to come off.

What are the basic stages in the driveway asphalt repair process?
The main steps in the driveway asphalt repair process are these:
- Clean and prepare the surface.
- Seal cracks and fill potholes.
- Seal the entire driveway surface.
Now, we’ll go over each of these steps in detail.
1. Clean and prepare the surface
This stage is one of the most important ones in the whole process. Even if the asphalt seems to be spotlessly clean to you, you should still go some extra mile and make it completely free of dirt, debris, and vegetation. Otherwise, they will stick to the repair materials, preventing them from doing their job properly.
- Remove any vegetation growing along the edges of the driveway or in the holes or cracks in asphalt. You can do it with a screwdriver, wire brush, a trowel, or even an asphalt crack torch. It works on propane and easily eliminates any vegetation.
- Take a stiff bristled broom and meticulously sweep any debris off the driveway surface. Pay particular attention to cracks and holes, if there are any. Then, if you have a leaf blower, go over the driveway with it as well.
- Take a pressure washer with some detergent and thoroughly clean the surface. If the driveway is sloping, move from the highest spot downwards. Pay particular attention to places with oil or grease. If necessary, add more detergent to get rid of those stains.
- Finally, using the same washer, this time without detergent, clean the whole length of the driveway again and let it dry completely. Make sure there is no water remaining in the holes or cracks.

Source: https://www.amazon.com
2. Seal cracks and fill potholes
With your driveway clean and dry now, it’s time to seal all of the cracks and potholes. If you have too many of them, it would probably be wiser to seek professional help and have the entire surface replaced.
Cracks
To fix hairline cracks (3/4 of an inch wide), you can use a bottled filler (requires a caulking gun). This is how it’s done:
- Once again, make sure there is no dirt or vegetation in the crack.
- Shake the bottle well in order to mix the filler.
- Cut the tip of the bottle to the width slightly less than that of the crack. Put the bottle in a caulking gun.
- Move the nozzle along the crack, pulling back on the trigger of the gun and releasing it as you go.
- Use a putty knife to remove the excess of the filler over the surface of the driveway.
- Leave the filler to settle and dry for about a day. If you see that another coat is required, apply the filler again.
Note that you shouldn’t drive or walk over the filled crack for at least two days.
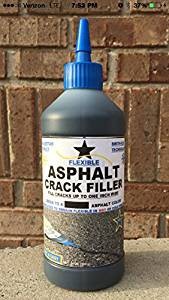
Source: https://www.amazon.com
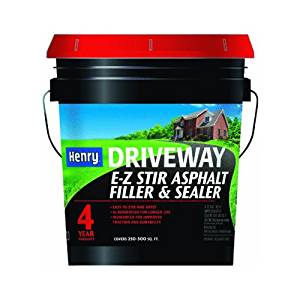
Potholes
For filling potholes, purchase cold asphalt filler, which represents a combination of rocks and asphalt tar and is stored in big plastic sacks or buckets. How much of it you buy depends on the number of holes to be filled and the size of each one. For instance, a hole about two feet wide will require half a hundred pounds of filler. If you have two holes of that size in your driveway asphalt, you will need a hundred pounds.
- Make sure the hole is clean and dry.
- If the hole is too deep (over 4 inches or below the asphalt level), fill it with such a material as concrete, gravel, or clay, which can be packed tightly. A hole 4 inches deep will enable you not to waste valuable material and create sufficient bonding between the filler and the old asphalt.
- Put the filler into the hole. Note that the filler should be above the driveway surface to approximately an inch, as you’ll later have to pack the material down.
- With a tamper, pack the filler down until it’s one level with the driveway surface. The filler must be packed to a very hard state within the hole.
- Sweep the leftovers with a stiff bristled broom and don’t drive or walk over the hole for around 48 hours.
Note that if your driveway has a number of holes, it’s a good idea to buy or rent (for $60-90 per day) a vibrating plate compactor. It will greatly facilitate and speed up the tamping process.
3. Seal the entire driveway surface
Although by sealing the cracks and potholes, you have already done much to prevent the driveway asphalt from being ruined by relentless natural forces, sealing the entire surface will make it looks like new and further protect it from UV, road salt, and freeze/thaw cycles if you live in one of the northern states. Here is what you need to do:
- Purchase a sealer. These are your options:
- Rubberized: good for low temperatures, protects against harmful ultraviolet light (it breaks asphalt under long-term exposure)
- Coal tar: breaks under very cold conditions, not environmentally friendly, has an unpleasant smell, but seals the surface very well
- Asphalt sealcoat: has asphalt at its base, doesn’t smell strong, better from the ecological point of view
- Mix the sealer you’ve selected. Use an electric drill equipped with a special attachment. The process normally takes 6-7 minutes.
- Dip a brush in the sealer and cover one of the borders (the higher one if your driveway is sloping) with the sealer, as well as the edges of the driveway. Wear gloves to protect your hands.
- Pour some sealer in a line from the left to the right edge of the driveway and spread a thin layer with a squeegee. Limit yourself to a 4-foot area of the driveway for one line of sealer.
- If the driveway is sloping, take a brush with the sealer and go over the highest edges of the driveway again. Make sure the first layer of sealer is dry before you apply the second one.
- Wait for around a day (depends on the recommendations from the sealer’s manufacturing company) and go over the whole surface of the driveway again.
Source: https://www.amazon.com
How often do I have to reseal my driveway?
For asphalt surfaces, depending on the maintenance efforts and climatic conditions, a standard resealing cycle is from 6 to 10 years.
How much will sealing my driveway on my own cost me?
We don’t know what type of sealer you will choose, but the typical range is from $150 to $420.
What warranty do sealer manufacturing companies give for their products?
It’s usually 10 years. Note, however, that this term can be shorter if winters are particularly harsh in your region.
What temperature is right for sealing my driveway?
Professionals recommend doing the resealing work when the thermometer shows 60-80 degrees Fahrenheit.
Also, before you get down to the task of repairing your driveway asphalt, have a look at the weather forecast. Choose a sunny day with no rain predicted within the next 2 days. The driveway must be dry so that the repair materials could get hard enough to produce the desired effect.

Repairing an asphalt driveway is not that difficult and can easily be a DIY project, still you need certain time and effort applied to carry it out. To achieve the best results, you need to remove any dirt, debris, and vegetation from the driveway, purchase quality materials, and closely follow the technological requirements, or call for professional assistance.