Tiled floor can boast of more than one thousand year history. Of course it’s very popular and common used now. Tiled floor is especially used for bathrooms, toilet facilities or kitchens. Why tile is so popular? The answer is obvious – it isn’t afraid of humidity or high temperatures, it is easy to wash it and it serves for a very long time.
The only one disadvantage of tiled floor, which we can notice, it’s not very complex, but very laborious and careful process of tiling. So, if you can’t be calm and serious for a long time I strongly recommend you to hire professionals here.
But if you are ready to tile by your own, I’ll tell some tips and secrets.
Quantity of tiles that you need
Scheme of calculation is very simple. You should divide the area of your floor on the area of the tile. But don’t forget to add to your result about 10-15% for cutting, waste or possible damage during laying.
What do we need for laying?
When you finished with your calculation you should know what tools you need. Your essential seat must include: glue for tile, rubber for joints, plastic crosses, serrated spatula, building level, mallet and tile cutter.
The order of work
1. Definition of benchmark
One of the most significant thing is to set the first pile, the pile from which we start our process. It’s better to start the first row from the wall which is in sight in the room. If you are going to have some furniture on your floor, under it you can use cuttings of tile.
2. Laying the layer with glued composition
Now it’s time to tile. Prepare glued composition and coat not very thick layer on the floor. You have to smooth out all glue with a serrated spatula, leave striae of the same height of the surface. Experienced tilers coat glue for 1m2 of the surface at a time. But if you have some doubts in concerning yourself like a professional tiler you can easily
But for beginners it could be a big area, so I advice to you to coat the area for one tile, which are going to lay now.
Also there is one important detail. If instead of special glue you use slush, you have to wet a tile before you lay it. It’s necessary for good bond of tile with solution.
3. Laying floor tile on the glue
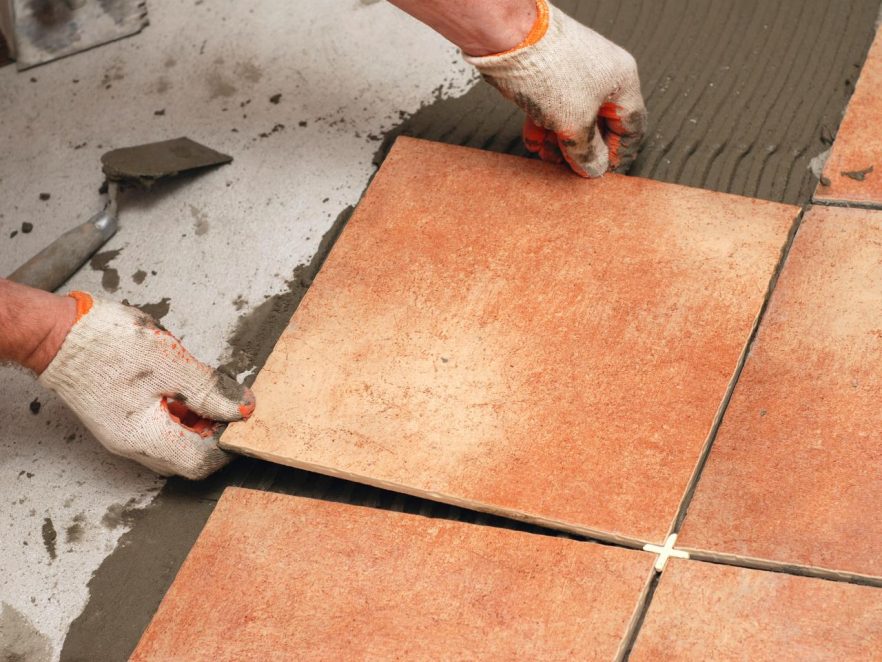
Lay the tile on coated glue composition, press it from all the sides and smooth it out with your hands.
It’s necessary to check straightforwardness of the row and level with a help of a building level. It’s unlikely than you can to define correctness of tile laying by eye. Most likely than you should down some corner and up the other. To down a part of a tile you should press on it with your palm or rap with a mallet. If a tile slumped you should lay under it additional part of mortar.
Between tiled tiles you have to insert plastic crosses. From the thickness of crosses will depend the thickness of seam. If you forgot to buy plastic crosses, you can easily replace them on usual matches.
4. Necessity of cutting
During tile’s laying often can appear such situation when a whole tile can’t be fitted into the row and you need to cut it. In this case a tile cutter or a grinder will be your best helper. But what to do if you don’t have these tools in your household? The answer is very easy – you can use a glass cutter or a hacksaw. Of course, it’s not so convenient, but in this case you don’t have to buy expensive tools.
5. Smoothing out of seams
Tile-to-tile seams, which form during the process of laying, must be filled with special composition – seams smoothing out. For this you have to put out all plastic crosses and smooth out seams with white or colored smoothing out composition with a help of a rubber spatula. Don’t forget that your smoothing out must be matched with your color palette of tiles.
Smoothing out usually dries about one day. After one day you can wash the surface of tiles with a wet cloth and you can use it by purpose!