What are the benefits of the ceiling fans?
Ceiling fans are sometimes underrated by the homeowners, who think that they’re an unnecessary source of the additional electricity expenditure. Some people also think that those fixtures are the fillers of any interior design and avoid installing them even being aware of their benefits. However, if you choose the right ceiling fan with interesting blade designs and shapes, you’ll be able to incorporate it into the room decor just as any other lighting fixture. And, if you have those good old fans that squeak and rattle vigorously when they work, you should certainly think about replacing them. As modern fixtures and their lighting part is designed the way that the fan produces hardly any noise while working.
The most important thing is that ceiling fans are actually really budget-friendly. They decrease the electricity bills due to the fact that they make the cool air move around the room. And, when that happens, it feels much fresher and cooler in the room even when the air conditioner doesn’t work all the time. And, that thing is one of the biggest electricity consumers in your house. The similar process happens in winter. But, this time the fans make the warm air move from the ceiling down to the people’s level, which, again, makes us feel warmer with lower heating settings. Some electricians and other specialists inform that ceiling fans allow saving up to 40% of the air-conditioning expenses and up to 15% of energy use during the winter months.
Besides, we all know that the flow of air makes us cool down a little bit, that’s why working fans and opened windows might create a comfortable environment when it’s not too hot outside and keep the air conditioner silent. That’s also why the outdoor fans are installed above the patio or veranda areas.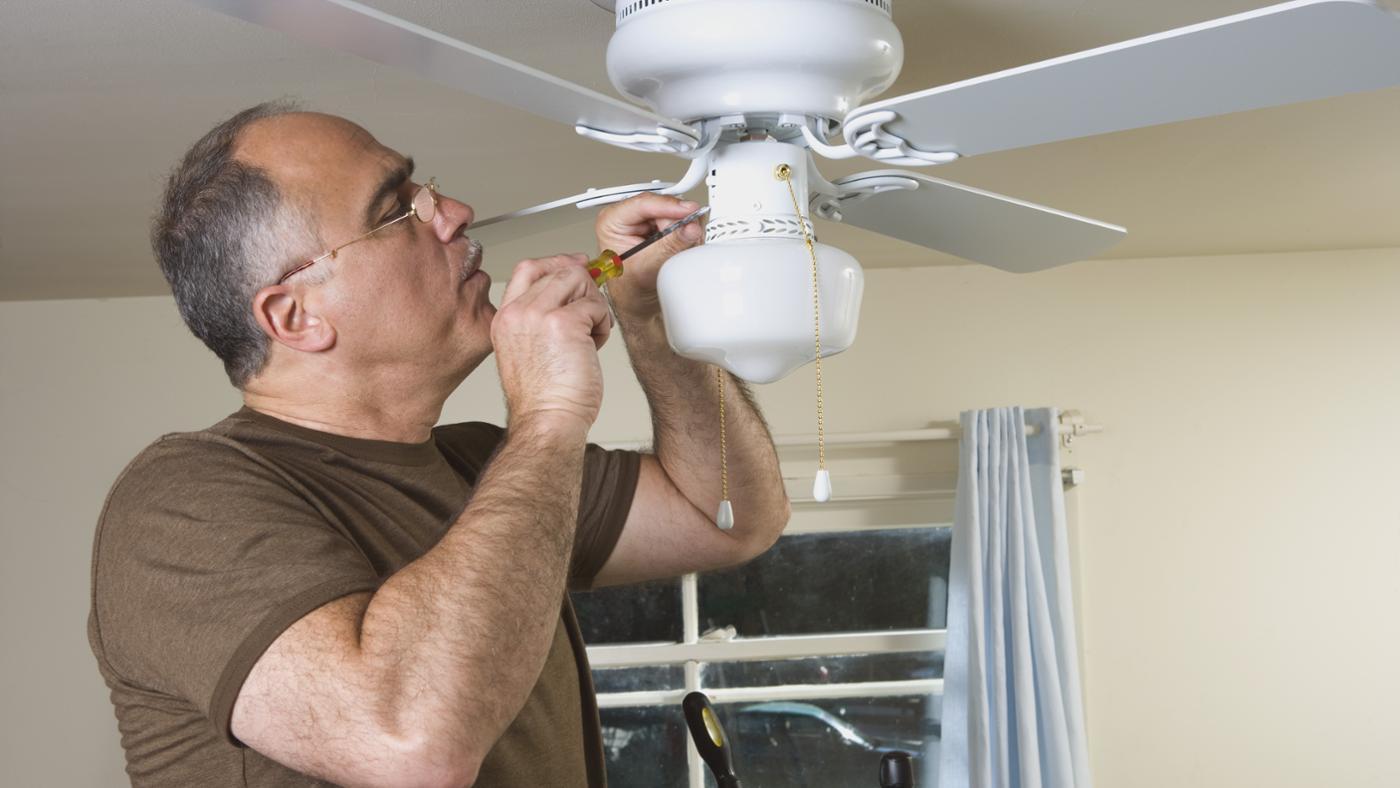
The ceiling fan installation complexity is quite moderate. So, if you follow the steps on how to install a ceiling fan given below and stick to the manufacturer’s instructions, you’ll be able to install your fixture on your own. However, I highly recommend visiting HireRush.com and finding an electrician to do this task if you’re not familiar with the electricity work and haven’t done anything related to it before. Don’t risk your life and safety, please.
Post your fan installation task now
How to install a ceiling fan
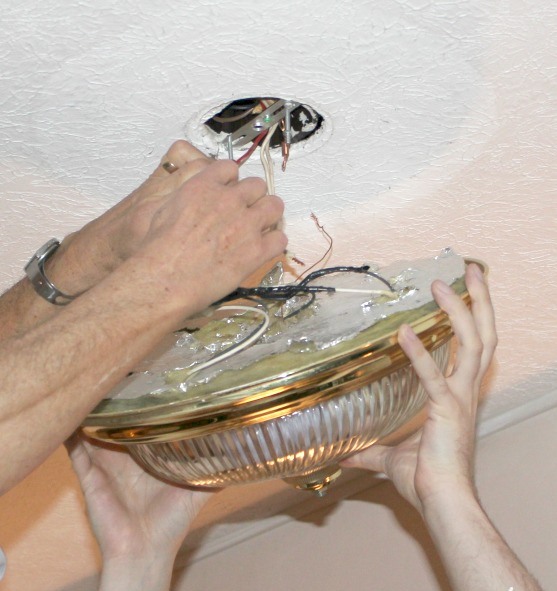
- Dismantle light fixture you already have on your ceiling. Make sure not to forget to turn off the electricity at the necessary breaker to insure a save installation. Then, take off the decorative part (like a glass globe) of your current lamp. Undo the retaining nut or screws, with which the fixture is attached to the ceiling. Pull it down a little bit and proceed to disconnecting the wires. In order to do that, untwist each plastic connector that sits on the wires’ ends. If you see plastic or metal clamps, which hold the cable, you should unbend or loosen them prior to extracting the box. Then, you’ll be able to pull out the cable without much effort once the electrical box is almost detached.
- Next thing you’re going to do is to get rid of the current electrical box you have in the ceiling. The matter is that most ordinary boxes aren’t designed to support quite heavy fans. Maybe, you may skip this step if you’re not installing the fan from scratch, but just replacing your old one with a better and newer model. Otherwise, you’ll have to purchase a special ceiling fan brace at the store together with the main product and replace the old electricity box with it. It includes a metal plank or tube that provides extra support to the fixture. And, those supporting hands are already attached to the electricity box. There’re a couple of brace’s options you may choose from. There’re the ones that may be fastened with the screws if you can reach the spot from the attic or if you’re just constructing the house. If that’s not the case, opt for the holder that may be inserted into the hole in your ceiling. Generally, you may take picture of your electrical box and the hole in the ceiling (after you remove the old lamp, of course) and consult with the shop assistant to see which fan and braces to buy.
- Mount the electricity box and braces. Pull the cable that comes from the hole in the ceiling into the knockout opening in electric box. (Check if the wire connector is secured to the knockout hole). Adjust the box to the opening in the drywall in the ceiling and push it firmly against the bottom part of the joist. Attach the electric box to it using a couple of the 1 1/2-inch No. 10 hex-head screws. They should come in the package with the box and braces. Screw them in place with the help of an electric screwdriver. The new electrical box must be grounded or attached to a ground wire in the ceiling

- If your fan has a decorative ceiling medallion, attach it to the ceiling right after the electricity box is secured in place. To do that, apply a thin strip of urethane-based glue onto the medallion’s back. Pull the cables through it. Center it regarding the electricity box and press it firmly to the ceiling. Secure the medallion by driving 4 6d finishing nails into the joist. Conceal the heads of the nails with the caulk. If you’re going to paint the medallion, do it before installing the ceiling plate.
- Attach the ceiling plate. Position the plate right below the electricity box and pass the cables through its center opening. Connect the metal plate and the box using two 1 1/2-inch-long 10-32 machine screws.
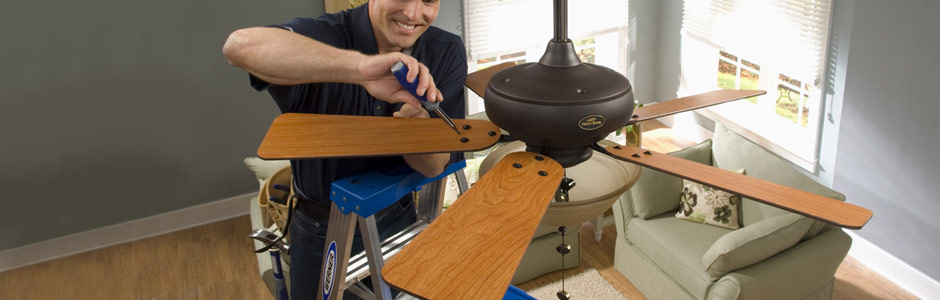
- Assemble the fan regarding the manufacturer’s instructions. As the fan is quite heavy, you’ll need to make sure that it won’t fall down while you’re connecting its wires with the ones from the electricity box. A lot of features are designed the way that one person may easily hand them up a little bit below the ceiling to be able to do the electricity job. However, if you can’t do that to your fan, ask someone to be your helper and support the fan from the floor to let you finish off the wiring.
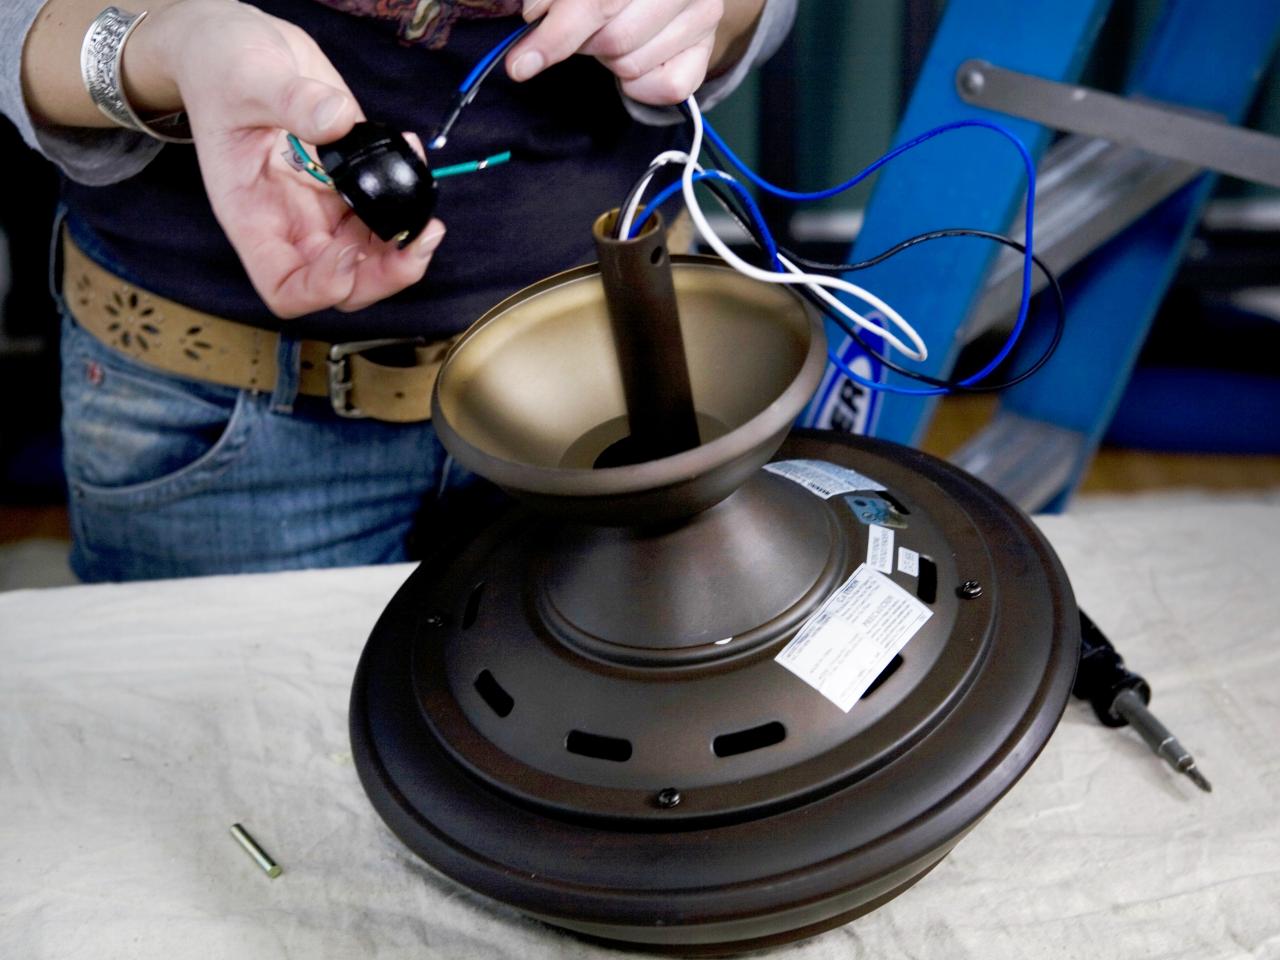
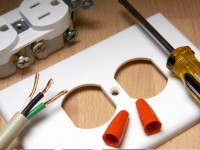
- Wiring schemes are different for various ceiling fan features. That depends on the additional functions (like lights or speed controlling) they might have. However, the basic ceiling fan installation is quite similar to the way the electricians install a simple ceiling lamp. So, you’ll need to take the wire nuts (or twist-on wire connectors) and connect the feature’s black (or colored) and white wires with the corresponding ones in the electricity box. If your fan has a green grounding wire, you’ll need to join it with the green or bare copper wire of the main cable. If your room features a different wiring scheme and you can’t really figure it out, it’s better to hire a licensed electrician and avoid electricity damages.

- Finish installing the fan by pulling it up into its proper position against the medallion. Secure it in place with 2 canopy screws. If you haven’t done that in advance, attach the fan blades to the blade irons. After that, fasten the latter ones to the fan’s motor using the screws from the package. Plug the housing of the fan’s light part into the wire coming out from the bottom of its motor. Wrap up the process by setting up the shades and installing the light bulbs.