Installation of a new ceiling light fixture is one of the cheapest ways to upgrade you house and free up more illumination. Fix new ceiling lights yourself quickly and cheaply.
Today there is a common perception that home projects relating to electricity are dangerous. Most people tend to hire professionals and avoid this hazardous job.
In spite of this, there are still some things that can be accomplished without a great deal of difficulty. In this article we are going to talk about one of such.
To replace your old lights that can no longer operate in a proper manner or to fix a completely new ceiling light from scratch you should first read our tips.
With our instructions below you will be able to install it relatively easy and at a low cost. This do it yourself guide will show you how exactly you can perform the task.
Alternatively, you can click the button below and leave a request. This option would be a bit more expensive, but guarantees you a desirable result. Find a suitable pro and let him work for you.Leave your request here
But if you still have a strong intention to do get the job done yourself, think of some tools and materials that may be necessary for it. All you need is available on market.
It’s not a problem to purchase new light and some additional materials. Besides, you will need a screwdriver, a wrench and utility knife.
Meet our bit by bit instruction and follow each step. Improve your home and make sure your house shines brightly.
5 Steps towards new ceiling lights
-
Power down
To ensure safety while installing you have to turn off the power first. Don’t miss it, as this step is vitally important.
So, before taking any action get to your electric switchboard and turn the lights off. Always remember to check up whether the power is dead (you should do it better twice) and only then, proceed to work.To verify your safety use a voltage tester. It will indicate that the circuit is dead and you can begin.
Be cautious! Don’t touch any wire with bare hands until you are sure no electricity runs to the fixture. -
Prepare tools and get ready
Next step you should do is to look over any instructions of the new lights. They may be and in most cases actually are different.
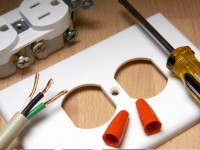
The fixture normally has black and white wires – hot and neutral accordingly. Yet, some have the additional green (ground) wire.Remove not more than an inch of the wires isolation on the end of them. If employing a knife, make sure to strip the plastic cover thoroughly in order not to damage the cables.
After that, remove old ceiling box and other appliance. You will notice the wires of the same colors. -
Connect the wires
Connect the wires protruding from the ceiling with the new light fixture wires properly. Each color should correspond.
If your junction box is much heavier than the old one, you may need to attach the supporting mounting. In such way you ensure the ceiling joist will hold up the weight.
When doing this connecting job, you will most probably need some help. Ask your friend to hold the fixture.Make sure you carefully twisted the wires. Then, tap them off with wire nut. The ground wire could be hidden by twisting onto green grounding screw.
Position the base plate to the mounting strap. Complete the current phase with one more simple action. Just set new bulbs.
Actually, this is not the end. You should check your work now. Turn the light on. If everything is done properly, the bulb will lighten up. -
Attach the light fixture
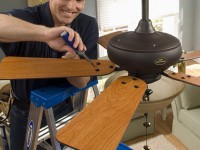
Now it’s time to fasten a new ceiling fixture. To ease your work, follow the directions that come along with the lights.
You should turn the electricity off again. Then, screw the ceiling plate to the mounting rod.
When finished, take care of the appearance. Hide the hardware into the ceiling box.It’s necessary to make sure the light fixture is secure. For this purpose, mind to check the canopy is placed correctly. Slide and fasten it in the right place if needed.
You also want the bolts to be slid through the light fixture slots. This will eventually tighten the canopy. -
Switch the light on
Good for you! Now it’s time to admire your new ceiling light and be proud of yourself for the installation that you have completed with no help.
Turn the electricity on again and satisfy yourself with the job done. Enjoy the light.
With one sweep you managed to renovate the interior design of your house and improve the lighting in general.
With HireRush.com offering you the best home improvement and organization ideas you can do much more than you think.