The truck is booked for Saturday morning. On Friday night you pull the washer away from the wall and find two hoses still full of water, a dryer duct packed with lint, and no idea how the drum is supposed to survive the drive.
Knowing how to move a washer and dryer the right way protects the machines, your floors, and your back. The steps below cover the prep that starts a few days before the move, the disconnect and loading sequence, and the hookup at the new home. A shorter section at the end covers the refrigerator, range, and dishwasher.
How Do You Move a Washer and Dryer Safely?
Quick answer: Unplug both machines, shut off the water, and drain the hoses into a bucket. Secure a front-load washer’s drum with transport bolts, and have a professional disconnect any gas dryer. Wrap each machine, strap it to an appliance dolly, keep it upright, and use two people on stairs and ramps.
Project snapshot
| Difficulty | Time | Typical cost | Skill level |
|---|---|---|---|
| Moderate | 1–2 hours to disconnect and load both machines | Low for an electric pair: dolly rental, straps, and new hoses; more if a technician installs transport bolts or handles a gas line | Basic tools, two people, and a careful lift |
Prep for moving washer and dryer units depends on what you own. Check each machine before moving day.
| Machine | Before moving | Main risk | Who disconnects it |
|---|---|---|---|
| Front-load washer | Drain hoses, install transport bolts | Drum and suspension damage in transit | You; bolts per manual or by a technician |
| Top-load washer | Drain hoses, check the manual for drum prep | Water left in the pump and hoses | You |
| Electric dryer | Unplug, remove the vent duct, empty the lint trap | Crushed duct, damaged cord | You |
| Gas dryer | Shut the gas valve, remove the vent duct | Gas leak at the connection | A qualified professional |
Before Moving Day: Measure and Check the New Laundry Area
Measure every doorway, hallway, and stair turn on the route out, and the same path at the new place. Add the depth of the dolly to the machine’s depth, since that’s what has to clear the tightest corner.
Look at the new laundry hookups before you pack anything. You need hot and cold water valves and a drain for the washer. The dryer needs either a gas line or a 240-volt outlet that matches its cord, since dryer cords come in 3-prong and 4-prong versions.
Two or three days ahead, run the washer through a spin or drain cycle and leave the door or lid open so the drum dries. Clean the dryer’s lint screen and the area around it.
Tools & Materials
- Appliance dolly with a strap (not a standard hand truck)
- Moving blankets and stretch wrap
- Bucket and old towels
- Adjustable wrench or channel-lock pliers
- Screwdriver and nut driver
- Transport bolts for a front-load washer (from the manufacturer, or installed by a service technician)
- Zip-top bags and painter’s tape for hardware and cords
- New washer hoses, if the old ones are cracked or bulging
- Small level
- Work gloves
How to Move a Washer and Dryer Step by Step
Step 1: Disconnect the washer
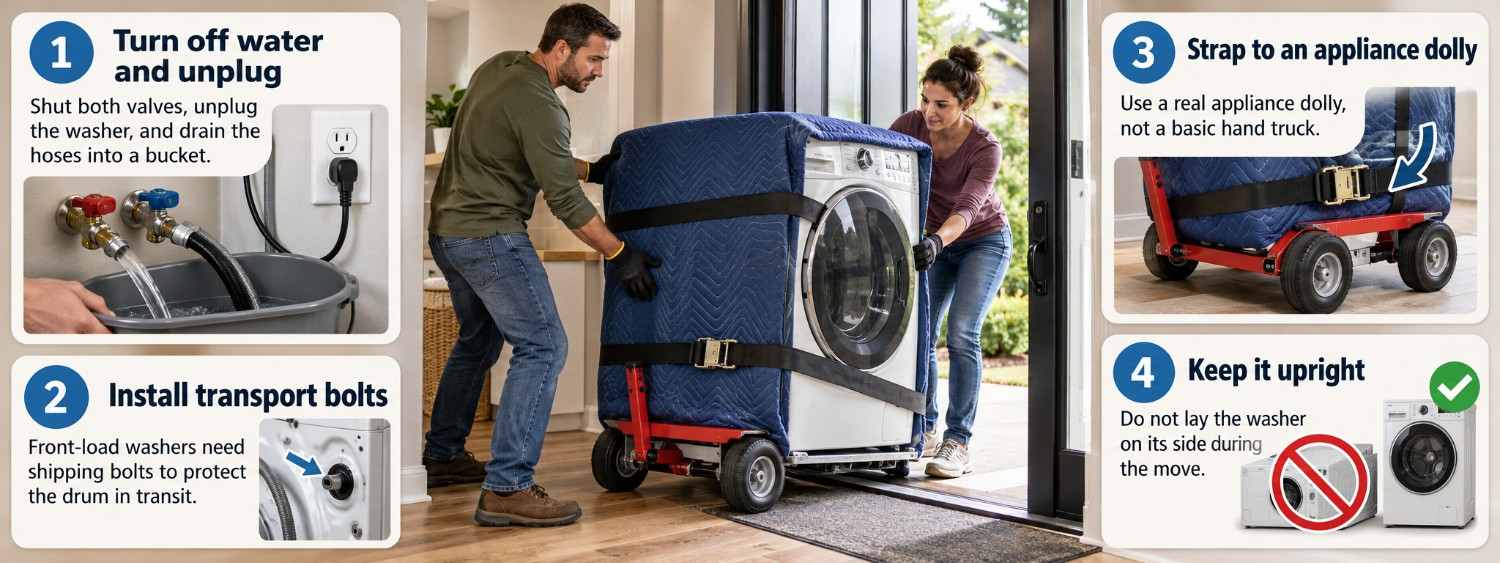
Turn off the hot and cold water valves behind the washer, then unplug it. Hold a bucket under each fill hose as you unscrew it, because the hoses stay full even with the valves closed. Unhook the drain hose from the standpipe and let it empty into the bucket.
Step 2: Secure the drum
A front-load washer needs its drum locked before transport. Whirlpool’s guide to moving a front-load washer says new shipping bolts must be reinstalled to avoid suspension and structural damage, and it recommends an authorized technician for the job. Other brands give their own instructions in the manual, so check yours, including for a top-load washer.
Step 3: Disconnect the dryer
For an electric dryer, unplug it by gripping the plug, not the cord. Loosen the clamp and pull the vent duct off the back.
For a gas dryer, turn the gas valve handle crosswise to the pipe to close it, and stop there.
NFPA’s dryer safety tips say gas dryers should be inspected by a professional to make sure the gas line and connection are intact and free of leaks. Book a plumber or appliance installer to disconnect and cap the line, and to reconnect it at the new home.
Step 4: Wrap and secure the doors and cords
Tape the doors or lids shut with painter’s tape so they can’t swing open. Coil each power cord and tape it to the back of its machine. Put the hoses and any hardware in a labeled bag and tape it to the washer.
Wrap each machine in a moving blanket and hold the blanket in place with stretch wrap. This protects the finish and gives the dolly strap something to grip.
Step 5: Move each machine on an appliance dolly
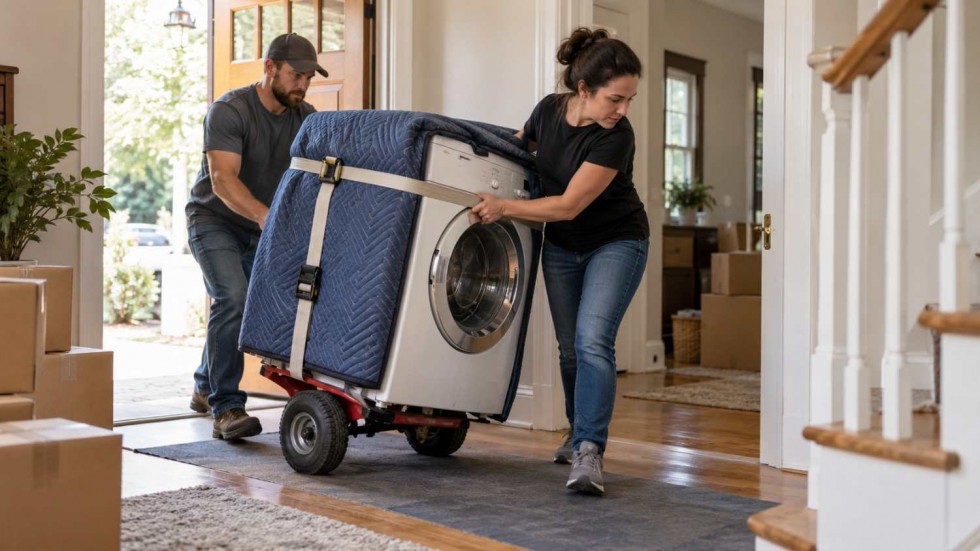
Slide the dolly under one side of the machine, cinch the strap tight, and tilt it back just enough to balance the weight over the wheels. Keep washers upright; Whirlpool’s guide warns that laying one on its side can damage it.
On stairs, go one step at a time. The person holding the dolly stays on the upper side, and a helper on the lower side steadies the load and calls out each step.
Safety: Lift with your legs and keep your back straight when you tilt or set down a machine. If it starts to tip, let it go and step aside rather than trying to catch it.
Step 6: Load and strap the machines in the truck
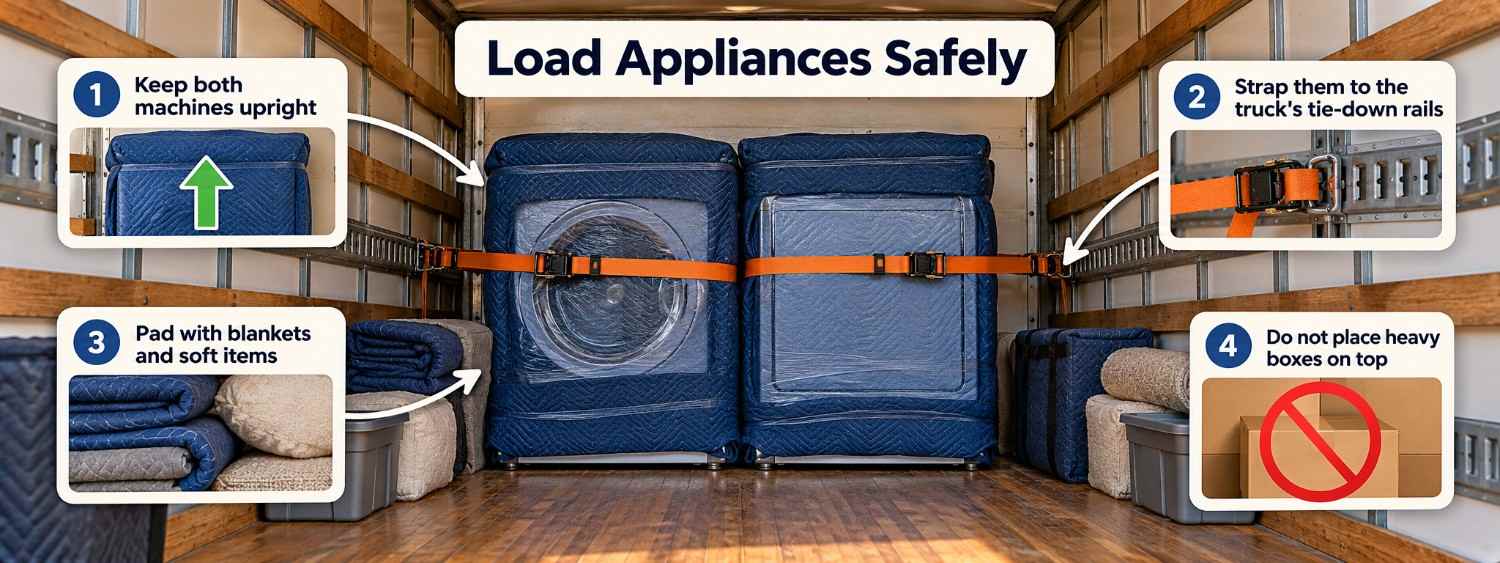
Set both machines upright against the front wall of the cargo area, and strap them to the truck’s tie-down rails so they can’t slide. Fill the space around them with soft items, not heavy boxes. Our guide on how to pack a moving truck covers where heavy appliances go in the loading order.
Step 7: Reconnect at the new home
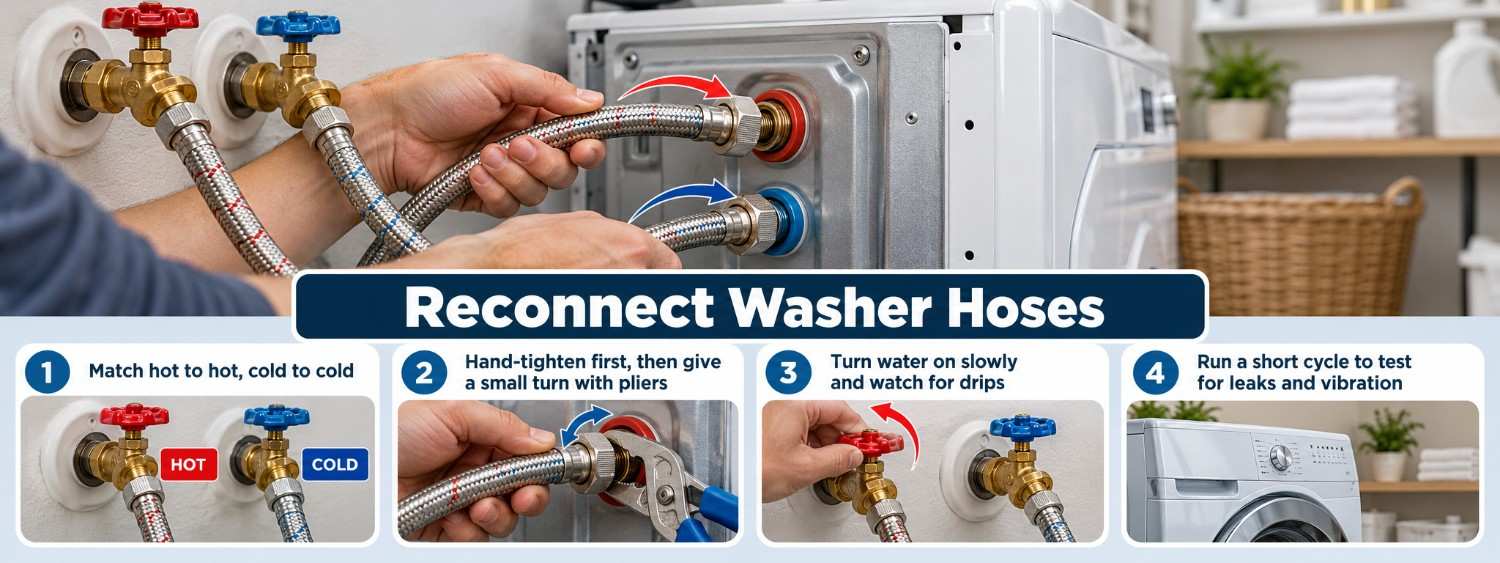
Remove the washer’s transport bolts before you run it; Whirlpool notes that a washer with the bolts still in won’t run and will vibrate excessively. Level the machine, connect the fill hoses to the matching valves, and turn the water on slowly while you watch for drips. Run a short cycle and listen for unusual noise.
Before reconnecting the dryer, clean the duct and the wall vent. Our steps on how to clean a dryer vent walk through it. Use rigid or flexible metal duct, as NFPA recommends, and make sure the outdoor flap opens while the dryer runs.
Pro tip: Moving day is a good time to replace old rubber fill hoses. Braided stainless steel hoses cost a little more and resist bursting better, and the washer is already pulled out from the wall.
Moving a Refrigerator, Range, or Dishwasher
The same rules apply to other large appliances: disconnect utilities, secure loose parts, and move them upright on a dolly.
- Refrigerator: Empty it, unplug it the day before, and let the freezer defrost into towels. Tape the doors shut and remove loose shelves. If it had to travel on its side, check the manual for how long to let it stand upright before you plug it in.
- Range: Unplug an electric range and remove the grates and knobs. A gas range needs the same professional disconnect as a gas dryer.
- Dishwasher: Shut off the water and power, and catch the water left in the supply line. If it’s hard-wired, have an electrician disconnect it.
DIY or Hire a Pro?
Good DIY project if…
- Both machines are electric
- The route is on one floor, or the stairs are wide and straight
- You have a strong helper and an appliance dolly
- The new laundry area already has matching hookups
Call a pro if…
- Your dryer or range runs on gas
- The route has narrow, curved, or long staircases
- The new home needs a new outlet, gas line, or drain
- You’re moving the appliances along with a full household
Bring in professionals whenever the move involves a gas line, a new circuit, or a stairway two people can’t manage safely. Hookup costs at the new home depend on the appliance and what’s already in place; the HireRush appliance installation cost guide shows typical ranges.
Common Mistakes to Avoid
- Moving a front-load washer without transport bolts. The drum can swing against the cabinet and damage the suspension. Install the bolts the manual calls for.
- Forgetting the water in the hoses. Fill and drain hoses stay full after the valves close. Drain them into a bucket before they ride on a blanket.
- Pulling the gas line yourself. A loose or damaged gas connection can leak. Have a professional disconnect, cap, and reconnect it.
- Laying the washer on its side. It can damage internal parts. Move it upright and strap it in place.
- Using a plastic foil duct at the new home. Thin foil or vinyl ducts crush and trap lint. Use rigid or flexible metal duct instead.
- Measuring only the machine. The dolly adds depth, and a tight stair turn can stop you halfway down. Measure the route with the dolly included.
Final Thoughts
If you’re figuring out how to move a washer and dryer without damage, most of the work happens before the lift. Drain the hoses, lock a front-load washer’s drum with transport bolts, and leave gas connections to a professional.
Wrap both machines, keep them upright on an appliance dolly, and strap them in the truck. At the new home, remove the bolts, level the washer, check for leaks, and connect the dryer to a clean metal duct. Hire movers when stairs, gas lines, or a full household move make the job too big for two people.