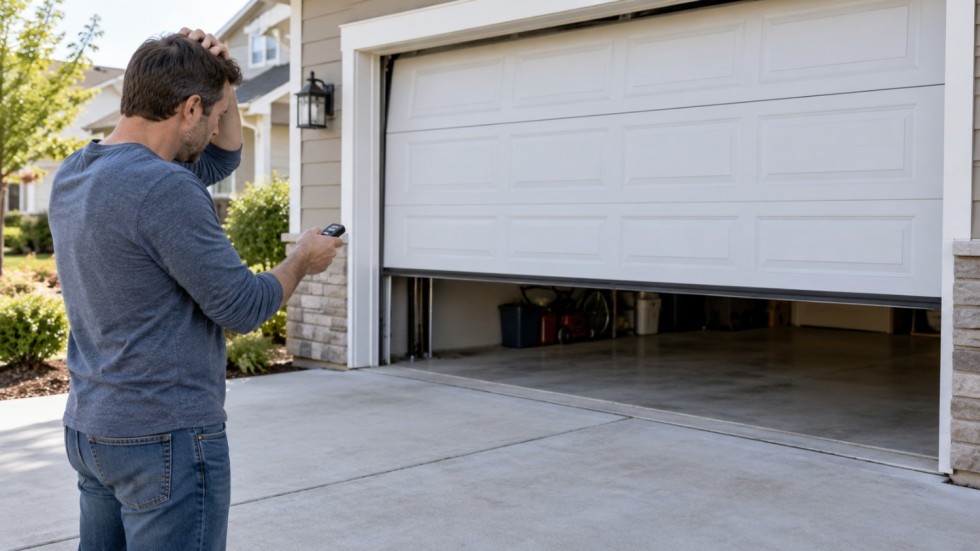
You press the remote on your way to work. The opener hums, the door lifts a few inches, then it stops and reverses while the light on the motor unit blinks at you.
Many garage door problems turn out to be small: a dirty sensor, a dead remote battery, or a door switched into lock mode. Others involve parts under enough tension to cause serious injury.
Below you’ll find how to repair a garage door when the fix is safe for a homeowner, starting with the quick checks, then sensors, the opener, and dented panels. The spring section explains why that job belongs to a technician.
Why Won’t My Garage Door Open or Close?
Quick answer: A garage door that won’t move usually has a power, remote, sensor, or opener problem, and those are often DIY fixes. Check the outlet, remote batteries, and lock switch first, then clean and realign the safety sensors. A broken spring, snapped cable, or door off its track needs a trained technician.
Match what you see to the likely cause before you touch anything.
| What you notice | Probable cause | What you can do | When to call a technician |
|---|---|---|---|
| Door starts to close, then reverses | Blocked, dirty, or misaligned safety sensor | Clear, clean, and realign the sensors | The sensors are aligned and it still reverses |
| Motor runs, door doesn’t move | Opener disconnected from the door, or a worn drive gear | Reconnect the trolley to the opener carriage | The trolley is connected and nothing moves |
| Nothing happens at all | No power, dead remote, or lock mode on | Check the outlet, batteries, and wall control | The opener has power but stays silent |
| Door feels very heavy or lifts crooked | Broken spring or loose cable | None: stop using the door | Always |
| Loud grinding or squealing | Dry rollers and hinges, or worn rollers | Lubricate moving parts | A roller is cracked or jumps the track |
| Dented or cracked section | Impact damage to a panel | Push out shallow dents | The panel is creased, split, or bent at a hinge |
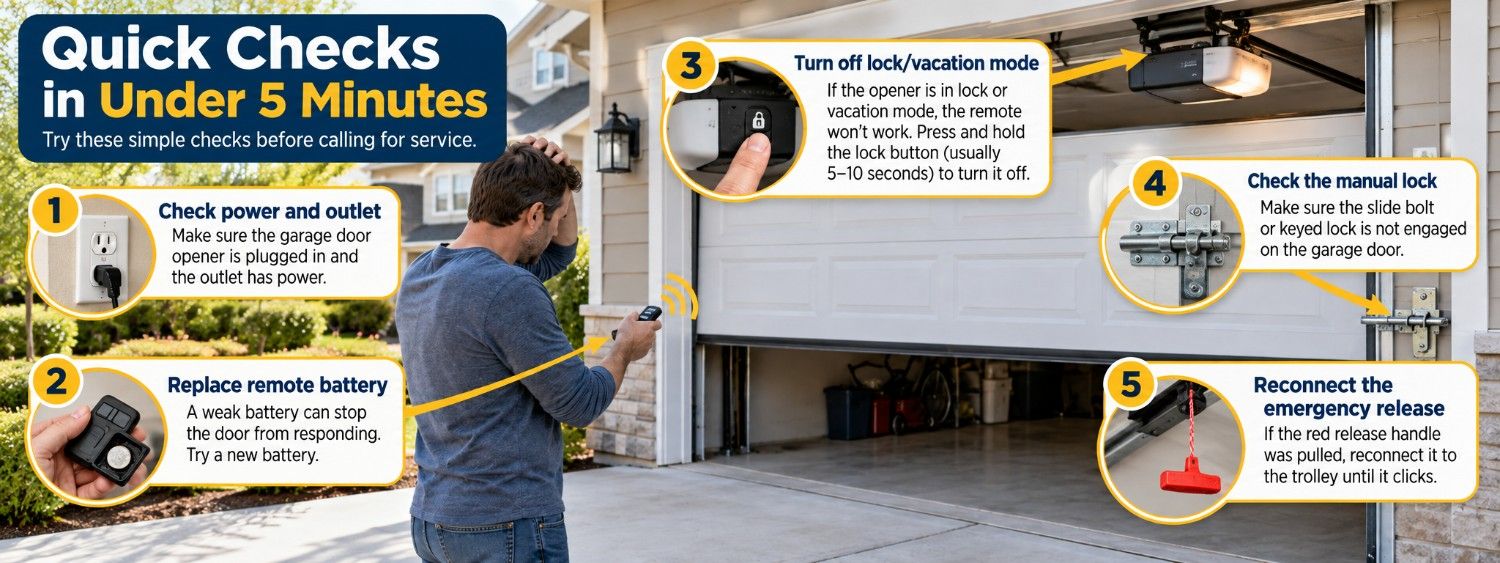
Quick Checks to Try in Under 5 Minutes
Run through these before you take anything apart:
- Power: Make sure the opener is plugged in. If the outlet is dead, check the breaker and any GFCI outlet that may share the circuit.
- Remote: Try the wall button. If the wall button works and the remote doesn’t, replace the remote battery.
- Lock mode: Many wall controls have a lock or vacation switch that blocks remotes. Turn it off.
- Manual lock: Look for a slide bolt or locking bar on the inside of the door that someone engaged by accident.
- Emergency release: If the red release cord was pulled, the opener runs without moving the door. Close the door by hand, then run the opener until the trolley reconnects.
Pro tip: Save a photo of the label on the opener’s motor unit. The brand and model number on it are what you’ll need to find the manual, a matching remote, or replacement sensors.
How to Repair a Garage Door Sensor
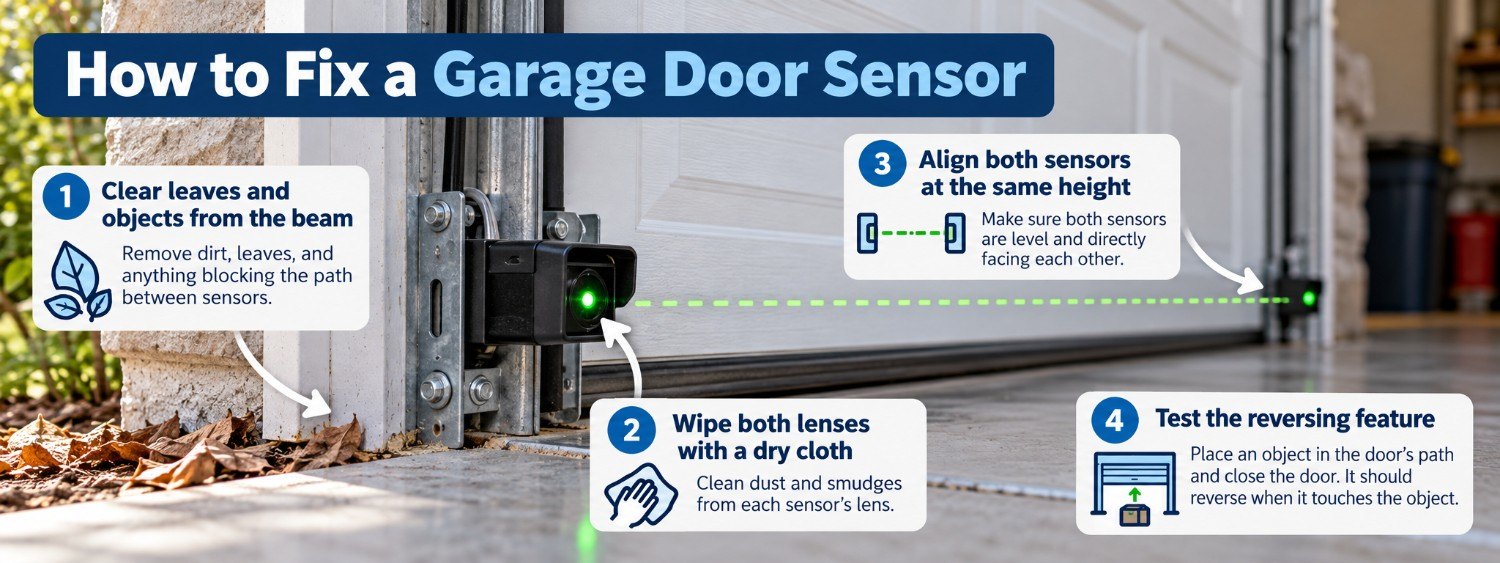
Safety sensors, also called photo eyes, sit a few inches above the floor on each side of the door. When anything breaks the invisible beam between them, the opener reverses the door instead of closing it.
That feature is required: under federal rules, residential openers made on or after January 1, 1993 must have entrapment protection such as an electric eye.
Tools & materials
- Soft dry cloth
- Small level
- Screwdriver or nut driver
- Stepladder (for the opener steps below)
- Garage door lubricant spray
- Rubber mallet and a scrap block of wood
Step 1: Clear the beam and clean the lenses
Remove anything near the sensors, including bins, rakes, and leaves. Wipe both lenses with a dry cloth, since dust, cobwebs, and water spots can block the beam. Try the door again.
Step 2: Check the indicator lights
Most sensors have a small LED on each unit. On many models, a steady light means the pair is aligned, while a blinking or dark light on the receiving side points to misalignment or a wiring problem. Your opener’s manual lists what each light pattern means for that brand.
Step 3: Realign the sensors
Loosen the wing nut or screw that holds the bracket, and gently aim one sensor straight at the other. Set a small level on top of each so both point at the same height. Tighten the bracket once the receiving light holds steady.
Step 4: Inspect the wires
Follow the thin low-voltage wire from each sensor up to the opener. Look for a staple driven through it, a chewed section, or a loose connection at the motor terminals. A damaged wire can be spliced or replaced, but disconnect the opener’s power first.
Step 5: Test the reversing feature
The International Door Association recommends a monthly photo eye and reversing test. Close the door and pass a broomstick through the beam; the door should reverse.
Then lay a 2×4 flat where the door meets the floor and close the door. It should reverse when it touches the board. If either test fails, have the door serviced.
How to Repair a Garage Door Opener
Opener problems tend to show up in one of three ways. Unplug the opener before you reach into the motor unit or rail.
The motor runs but the door doesn’t move
First, make sure the trolley is connected to the opener carriage (see the emergency release check above). If it is connected and the motor hums without moving the chain or belt, the drive gear inside the unit may be stripped.
Gear kits exist for many models, but the repair involves opening the motor housing, so many homeowners hand it to a technician.
The door reverses before it reaches the floor
If the sensors pass the test above, the close limit or force setting may need adjusting. Most openers have adjustment buttons or dials on the motor unit; follow the manual exactly and change one setting at a time. Re-run the 2×4 reversing test after every adjustment.
The remote stopped working
Replace the battery first. If that doesn’t help, reprogram the remote with the “learn” button on the motor unit, following the steps in your manual. An opener built before 1993 may lack the entrapment protection required since then, so replacing it is usually the safer choice.
How to Repair a Garage Door Panel
A shallow dent in a steel panel can often be pushed out. Hold a wood block against the dent from the inside and tap the block with a rubber mallet, working from the edges toward the center. Fill small leftover dimples with auto body filler, sand, prime, and paint.
Replace a panel instead when it’s creased, split, or bent near a hinge or roller. Damage there can make the door bind in the track. Panels are model-specific, so note the manufacturer and model from the label on the door’s edge before you order.
If several sections are damaged or the door is old, replacing the whole door may cost less over time. Our overview of garage door materials compares steel, wood, aluminum, fiberglass, and vinyl.
For noise, spray a garage door lubricant on hinges and roller bearings about twice a year. Tighten loose hinge screws, but leave the bottom brackets alone, since they connect to cables under tension.
How to Repair a Garage Door Spring? Leave It to a Pro
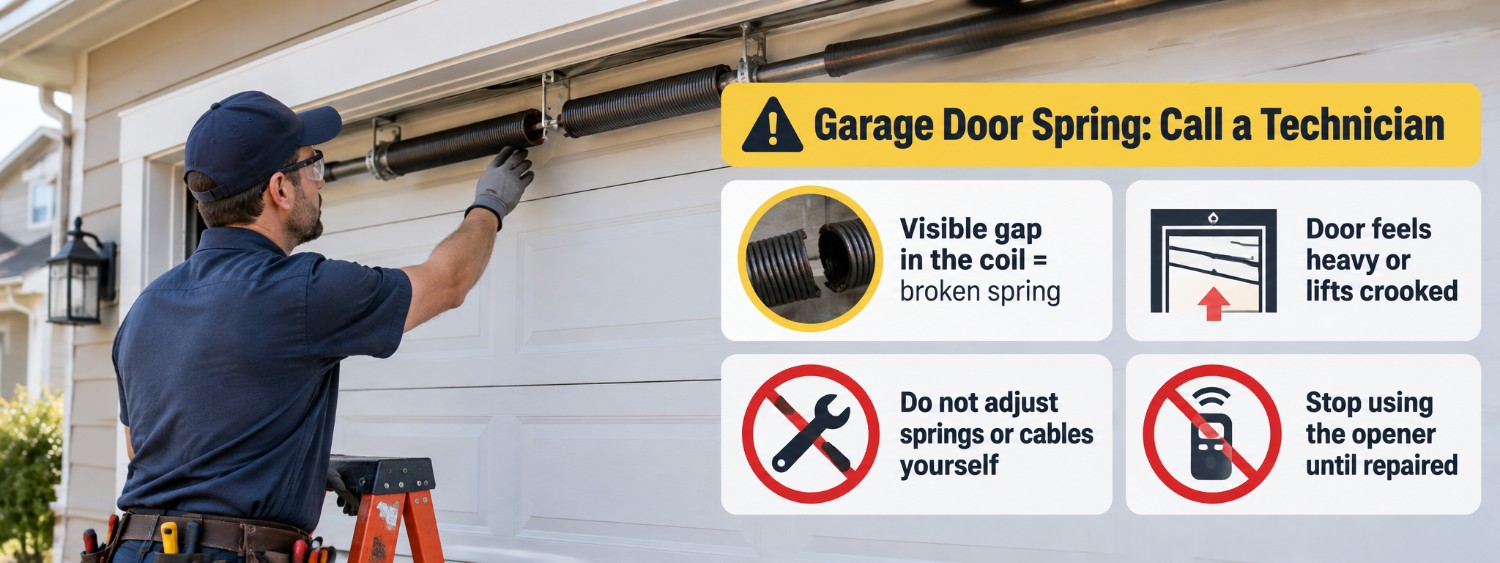
Springs carry most of the door’s weight. A torsion spring sits on a shaft above the door, while extension springs run alongside the horizontal tracks. When one breaks, you may hear a loud bang, see a gap in the coil, or find that the door suddenly feels too heavy to lift.
A wound spring is under high tension, and it can cause serious injury if a winding bar slips or a bracket is loosened. Don’t adjust, unwind, or replace springs yourself, and don’t keep using the opener to lift a door with a broken spring. The extra load can damage the opener as well.
To check spring balance without touching the springs, pull the emergency release with the door closed and lift the door by hand. It should lift smoothly with little resistance and stay open. If it drops or feels heavy, schedule a spring inspection.
When it’s an emergency
Call a technician right away if:
- A cable has snapped or is hanging loose
- The door has come off its track or hangs at an angle
- A spring broke with the door open, so the door could fall
- The door won’t close and your home is left unsecured
Keep people, pets, and cars away from a door in any of these states. If the door is closed but won’t open safely, engage the manual lock until it’s repaired; our article on how to choose a garage door lock compares the main options.
DIY or Hire a Pro?
Good DIY project if…
- The sensors need cleaning or realignment
- The remote needs a battery or reprogramming
- Hinges and rollers are noisy and need lubricant
- A steel panel has a shallow dent
Call a pro if…
- A spring, cable, or bottom bracket is involved
- The door is off its track or hangs crooked
- The opener’s motor or gear has failed
- A panel is cracked or bent near a hinge
If a part holds tension or carries the door’s weight, leave it alone. Check the HireRush garage door repair cost guide for local price ranges before you book.
Common Mistakes to Avoid
- Disabling the sensors to make the door close. Taping over or unplugging photo eyes removes the protection that stops the door on a child or pet. Fix the alignment instead.
- Turning up the force setting to beat a sticking door. A door that needs more force has a mechanical problem. Find the cause and leave the force at the manual’s setting.
- Loosening the bottom brackets. They connect to lift cables under tension. Leave them to a technician.
- Running the opener with a broken spring. The motor isn’t built to lift the full weight of the door and can burn out or strip its gear.
- Greasing everything heavily. Thick grease collects dirt. A light spray on hinges and rollers is enough.
- Skipping the monthly test. A reversing feature that fails quietly is only discovered when something is under the door.
Final Thoughts
Learning how to repair a garage door starts with the simple checks: power, remote, lock mode, and the emergency release. Dirty or misaligned sensors cause many doors to reverse, and they take minutes to clean and aim.
Remote programming, lubrication, and shallow panel dents are reasonable homeowner jobs. Springs, cables, bottom brackets, and a door off its track are not. Stop using the door and call a trained technician.