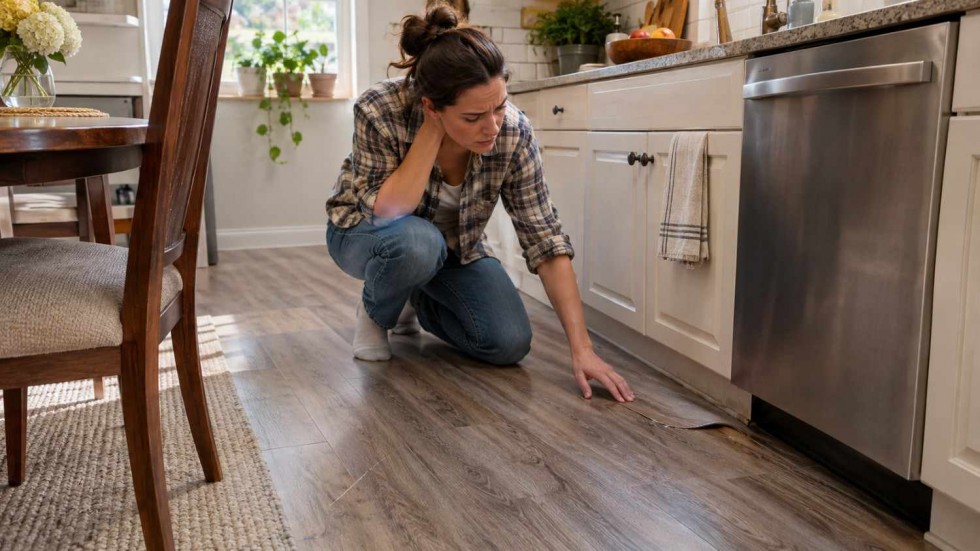
Kneel down to refill the dog bowl and you spot it: the planks beside the dishwasher have raised, soft edges that catch a fingernail. A few feet away, a dining chair has left a pale scratch across the grain. Laminate takes this kind of wear, and knowing how to repair laminate flooring lets you handle most of it yourself.
This guide walks you through matching each symptom to the right fix, closing gaps that keep reopening, dealing with water-swollen boards, and replacing a single damaged plank.
How Do You Repair Laminate Flooring?
Quick answer: Fill chips and surface scratches with color-matched wax or putty. Close gaps by freeing anything that pins the floor, then tapping the planks back. Replace any plank with a crack, a gouge deeper than 1/4 inch, or swollen edges, and stop the water source before you fix anything else.
Laminate Flooring Repair: Match the Damage to the Fix
Each symptom points to a different fix.
| Symptom | Likely cause | DIY fix | Call a pro if… |
|---|---|---|---|
| Fine surface scratch | Grit, furniture feet | Touch-up marker or pencil | None needed |
| Chip or gouge up to 1/4 in. | Dropped object | Color-matched wax or putty | Larger than 1/4 in.: replace the plank |
| Gaps between planks | Humidity swings, pinned floor, worn lock | Free fixed points, tap boards back | Gaps return across the room |
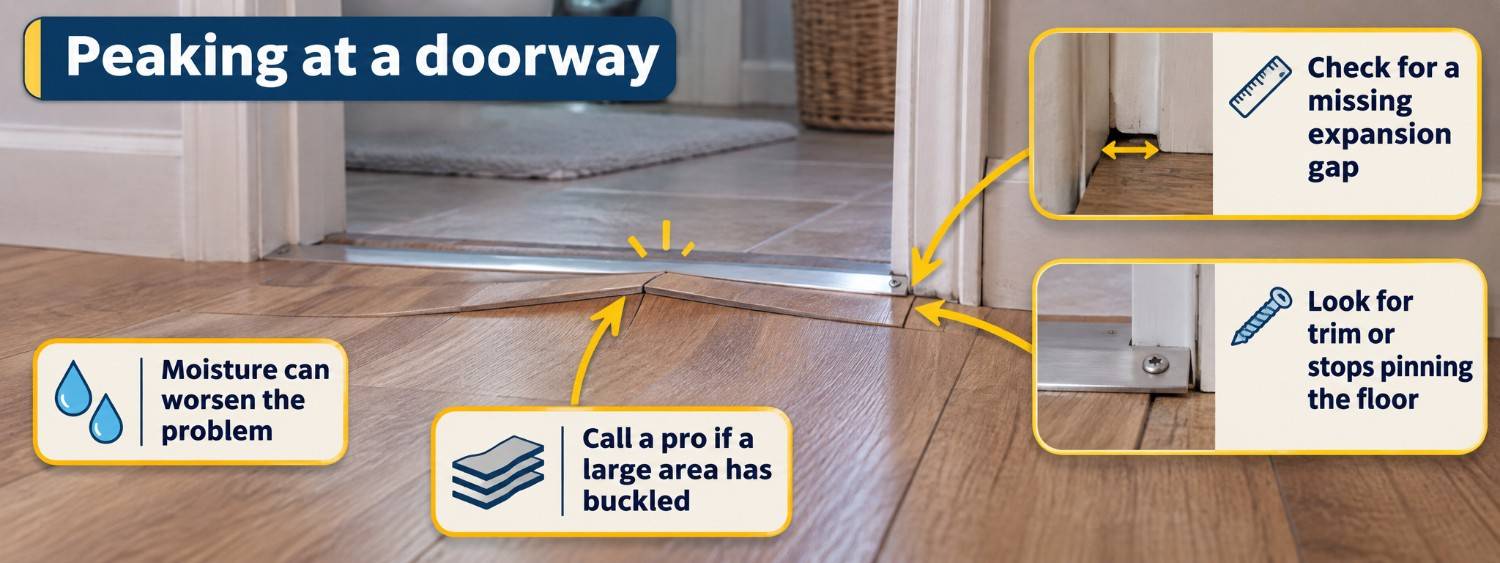
| Peaking or buckling | No expansion gap, trim nailed through, island on top, moisture | Pull trim, restore the gap | Large area or moisture underneath |
| Swollen, raised edges | Water in the HDF core | Stop the source, dry, replace planks | Active leak, wet subfloor, mold |
| Squeak or hollow spot | Uneven subfloor or thin underlayment | Not fixable from the top | Subfloor work needed |
| Cracked or deep-damaged plank | Impact | Replace the plank | Mid-room cut-out feels risky |
Quick Checks Before You Start
Before you repair a laminate floor, spend five minutes on these checks.
- Look for moisture: under the sink, around the dishwasher, along the fridge ice-maker line, and at exterior doors.
- Check for fixed points: baseboard or quarter round nailed through the laminate, an island sitting on top, or door stops pressing the planks.
- Confirm the expansion gap: pull a floor vent or lift the edge of the trim to see whether the planks have room to move.
- Find your attic stock: a few spare planks kept in their box, ideally still wrapped in the film.
- Measure indoor humidity. Mannington notes 30–65% relative humidity; dry winter air can shrink planks and open joints.
How to Fix Chips, Scratches and Gaps
Most laminate damage is cosmetic, so start with the simplest matching fix.
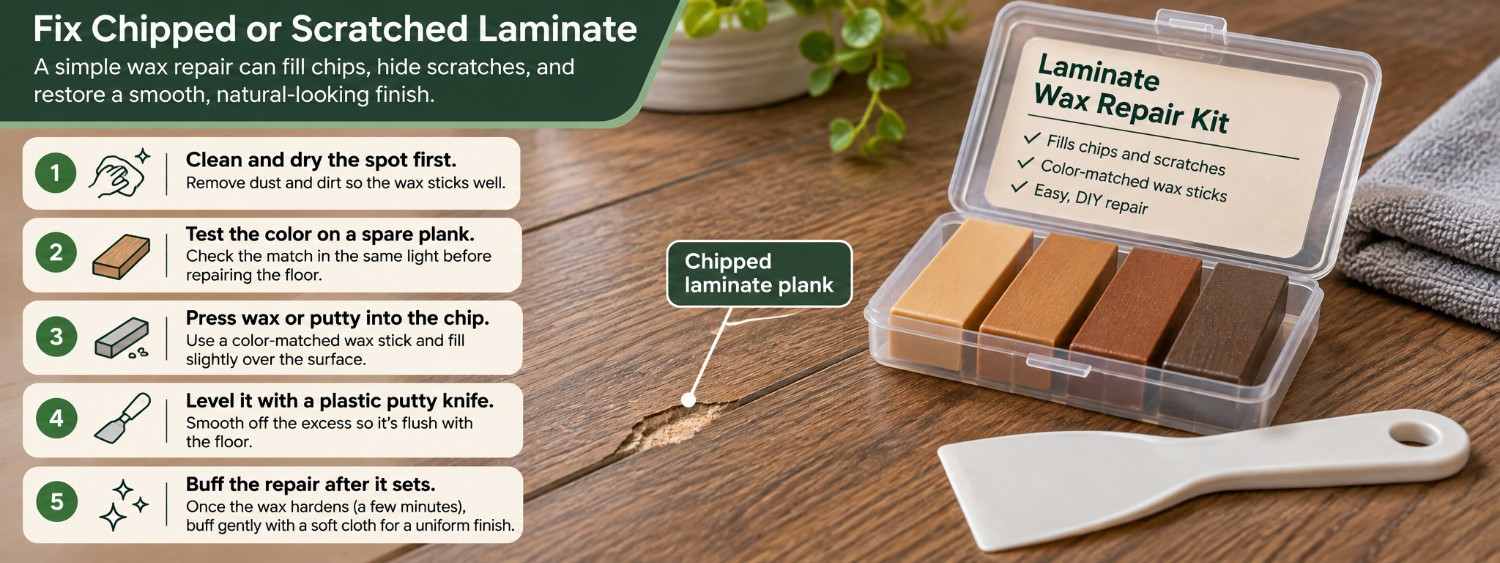
Tools & materials: color-matched wax or putty kit, touch-up markers or pencils, a plastic putty knife, a clean cloth, a tapping block, a gap fixer or pull bar, and PVA glue.
Step 1: Clean and dry the damaged spot
Wipe the area with a damp cloth and let it dry. A chip filled over dust or moisture will not bond, and the repair can lift within days.
Step 2: Match the color on a scrap
Test the wax or putty on a leftover plank, not on the floor. Compare the shade in daylight, since indoor lighting shifts warm tones.
Step 3: Fill chips with wax or putty
Press the filler in with a plastic putty knife and build it slightly above the surface. Let it set for the time the kit lists, then slice it flush and buff the spot with a soft cloth.
Step 4: Hide surface scratches with a marker
Run a touch-up marker along the scratch in one direction, then blend the edge with your fingertip. Work in thin passes, since a heavy line looks painted.
Step 5: Free the floor and tap gaps closed
First remove whatever pins the floor: trim nailed through the planks, a door stop, or a heavy island. Then place a tapping block against the plank and tap from the side the boards drifted away from. A bead of PVA glue helps hold the closed seam.
Pro tip: Tap only on a tapping block, never on the plank’s edge, or you will crush the click-lock. At end joints, slip a scrap of laminate in as a bridge to spread the force.
Can You Repair Swollen Laminate Flooring?
Not really. Once water swells the fiberboard core, the edges usually stay raised; the fix is to stop the leak, dry the area, and replace the affected planks.
A swollen HDF core is usually permanent: airflow dries the surface but does not return compressed fibers to thickness, so the seam stays lipped.
Dry the area within 24–48 hours to limit mold growth, per the EPA guide to mold and moisture. If the source is a dripping supply line or a loose trap, find and fix a leak under the sink before you touch the floor.
Do not try to dry the boards with a hair dryer or heat gun, and do not fill or sand the raised edges. Check your warranty, too: Mannington states that water events such as flooding or leaking appliances are typically excluded.
How to Replace One Damaged Laminate Plank
Replacing one plank is the most involved repair here, so work slowly.
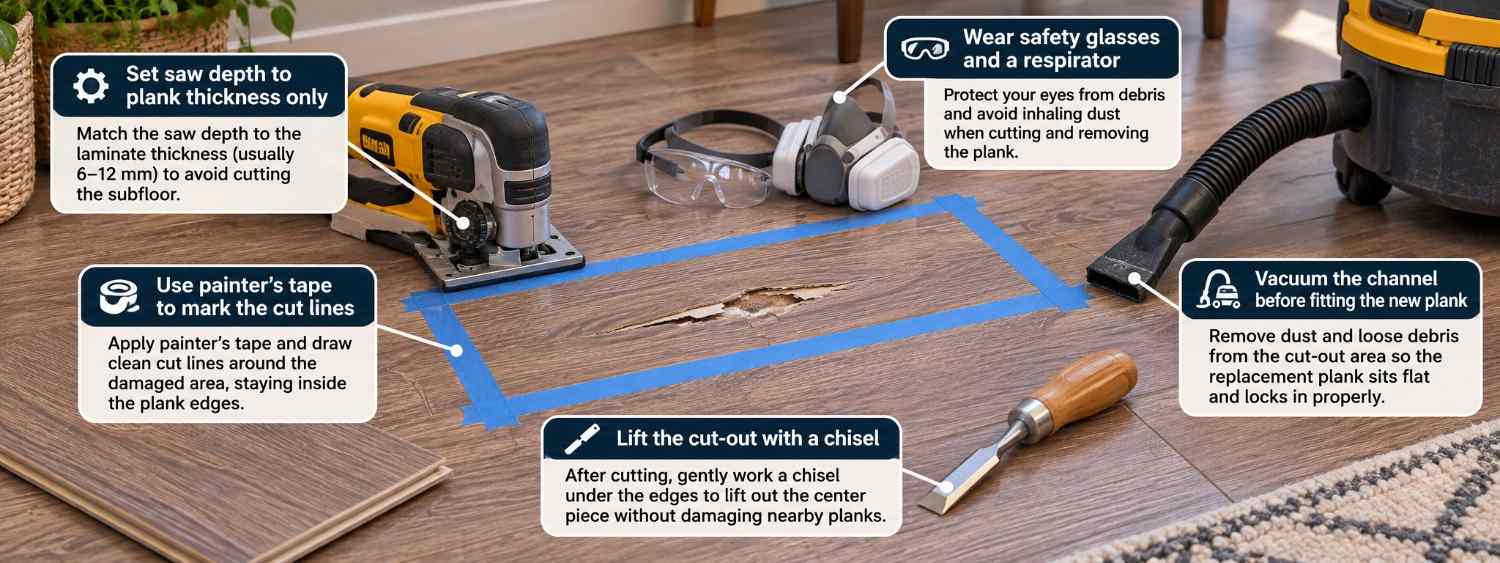
Tools & materials: a spare plank from the same batch, tapping block, hammer, pull bar, chisel, plunge or track saw (or an oscillating multi-tool), PVA glue, painter’s tape, vacuum, a weight of about 88 lb, safety glasses, and a respirator.
Step 1: Find a matching plank
Pull from your attic stock first, since a batch match is the only way the new plank blends with the old. Mannington advises against mixing planks from different manufacturing locations.
Step 2: Choose the edge or cut-out method
If the plank sits within a row or two of a wall, unclick the rows instead of cutting. For a mid-room plank, plan a cut-out.
Step 3: Unclick rows from the nearest wall
Remove the baseboard on the closest wall, then separate the rows one at a time. Label each loose plank with painter’s tape so you can reinstall them in order. Mannington’s installation instructions walk through the click-lock sequence.
Step 4: Cut out a plank in the middle of the room
Mark the cut with painter’s tape about 4 in. from each long edge, then plunge-cut to the corners. Set the saw depth to the plank thickness, lift the piece with a chisel, and vacuum the channel.
Safety: Wear safety glasses and a respirator. Old vinyl under the laminate may contain asbestos in homes built decades ago, so do not saw or sand that layer. If the floor sits over radiant heat, call a pro first.
Step 5: Trim the new plank’s locking edges
Dry-fit the replacement first. If it will not drop in, shave the lower lip of the groove and part of the tongue on the long side, roughly 4 in. (10 cm), as the maker’s guide shows.
Step 6: Glue, tap in and weigh it down
Run a thin bead of PVA glue along the exposed edges; Pergo advises using it sparingly. Angle the plank in, drop it flat, and wipe the excess before it dries. Weight the seam with about 88 lb (40 kg) for at least 2 hours, and overnight if possible.
Step 7: Reinstall trim and keep the expansion gap
Mannington requires a minimum gap of 5/16 inch at the walls. In practice, allow typically 1/4–3/8 inch, and check your product. Fasten the baseboard to the wall, never through the floor.
Pro tip: Set your saw depth on a scrap piece before you touch the floor. A blade that reaches the underlayment will nick a neighboring plank you then have to replace too.
When Laminate Damage Is an Emergency
Call a pro right away when the damage is active or unsafe, not cosmetic.
- Water is still spreading and you cannot find the shutoff.
- Planks rise quickly after a leak, which usually means water is trapped underneath.
- Water reaches outlets or appliances; cut power at the breaker before you pull up any boards.
- The standing water is sewage or floodwater, not a clean supply line.
- You see mold or smell a musty odor near the floor.
- Buckled planks have a lip high enough to trip someone.
Repair or Replace the Floor?
Replace the floor when many planks are swollen, gaps keep returning across several rooms, the subfloor feels springy, or your color is discontinued.
A full tear-out also makes sense if mold has spread or the core has stayed wet for days. If most of the floor is sound, spot repairs will buy years of use.
When you do decide to start over, our full laminate installation steps cover the floating-floor basics.
DIY or Hire a Pro?
Match the job to your comfort level and to what is hiding under the planks.
Good DIY project if…
- A single chip or a surface scratch.
- Gaps with no sign of moisture.
- A plank near a wall, where rows unclick easily.
- You saved spare planks from the same batch.
Call a pro if…
- There is an active or hidden leak.
- The floor feels soft or bounces underfoot.
- You see mold or smell damp.
- More than a few planks are swollen, or the whole room has peaked.
- The plank sits under cabinets, an island, or door casings.
- The floor covers radiant heat.
- Old vinyl sits under the laminate.
- You have no plank that matches.
If the repair needs a saw blade through the middle of the room or the cause is water, hire a pro.
| Job | DIY materials | Pro labor (editor estimate) |
|---|---|---|
| One chip or scratch | $10–$30 repair kit | rarely hired |
| One plank near a wall | $10–$30 kit | $150–$400 |
| Several planks after a leak | $30–$60 | $300–$1,000 or more |
These are editor estimates and vary by region and materials; they exclude fixing the leak and drying.
Small fixes like a one-plank swap are often billed by the hour; see our handyman cost guide for local hourly rates.
Common Mistakes to Avoid
- Filling or sanding swollen edges. Wet HDF does not flatten back, and sanding only opens the raw core to more water; replace those planks instead.
- Drying boards with a hair dryer or heat gun. Heat can distort the wear layer and does not undo core damage; use airflow and replace what stayed raised.
- Nailing quarter round through the laminate. Fasteners that pin a floating floor block expansion and cause tents at the joints; attach trim to the wall instead.
- Using too much glue on a replacement plank. Excess PVA squeezes into the joints and hardens where the click-lock should move; keep the bead thin.
- Mixing planks from a different batch. Shade and texture differ between production runs, so the patch stands out; use attic stock from the same box.
▶ Hire a Laminate Flooring Pro
How to Repair Laminate Flooring and Know When to Stop
Most laminate damage is smaller than it first looks. A color-matched filler hides a chip, a tapping block closes a wandering gap, and one spare plank replaces a cracked board, so the room rarely needs a full tear-out.
The repair that fails is the one that ignores water, because a swollen HDF core stays raised. Stop the leak, dry the space, and replace the planks that stayed swollen.
Those steps cover most of how to repair laminate flooring, and the same checks tell you when the saw or the moisture makes it a pro’s job.